The IM Popups Adtool type allows you to create multimedia popup advertisements in the form of an instant message box on your site's pages, providing an interactive advertising method that lets you speak to surfers and members.
IM Popups can also take certain Smarty variables, allowing you to automatically tailor your IM popup ads to information acquired from your affiliate or surfer. For information, please see the Custom Variables section below.
You can create a new IM Popup advertisement and upload photos to use with your IM Popup through the Adtools Admin. Simply go to the Adtools Admin, scroll down to the "Interactives Types" category, and click the "View Adtools" action icon next to the "IM Popups" adtool type.

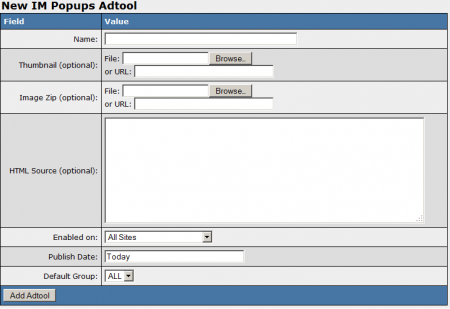
On the next page, you will see a section labeled "New IM Popups Adtool." Use the available "Image Zip" field to choose a .zip file of images, videos, or both formats to be used in the IM Popup. You can also use the "Thumbnail" field to upload a thumbnail preview image for this adtool.
Once you have chosen a site of images to use as content for your IM Popup, you can define all the other available settings for your gallery. These settings include:
- Name - The name of your IM popup advertisement.
- HTML Source - Input the desired HTML code and body text for your popup advertisement.
- Enabled on - Choose a site (or all sites) that you want this gallery to be enabled for.
- Publish Date - Input what date you want this gallery to be available from.
- Default Group - Select an adtool group to categorize the gallery under.
Once you have defined all of the available fields, click "Add Adtool" to add your new IM Popup advertisement to NATS.
Your new IM Popup will now appear in the "IM Popups Adtool" table, along with your other available IM Popup advertisements. This table provides you with the ID number, name, and default group of each available IM Popup adtool.
In order to display your IM Popup adtool on one of your pages, you must first download the corresponding .zip file from NATS through the Affiliate Adtools page. This .zip file will contain the image file, along with header_inc, jquery, and main scripts. It will also include the AC_OETags and pageear scripts.
Upload these scripts to your server, and copy them into the templates you wish to display your IM Popup on. Make sure that you include the header_inc script (ideally in the header) before the main script in your template(s), otherwise your IM popup will not display properly.
Before you can include your new IM Popup on one of your sites, you must first add a "SHOW" rule. To do so, click on the "Add a new rule" action icon next to your new IM Popup.

On the next page, simply add a "SHOW" type rule for the affiliate(s), program(s), and site(s) you want this gallery to be enabled for. You can also choose to enable this gallery for all affiliates, programs, and sites. For more information on rules in NATS4, please see our NATS4 Rules wiki article.
Custom Variables
NATS4.1 allows for certain Smarty custom variables with IM Popups. For example, this can allow for customized text in your popup, depending on the surfer or affiliate's location. You can output a surfer's country name, city name, area code, postal code, etc.
Supported Smarty variables include:
$smarty->assign('country_code', $countrycode);
$smarty->assign('country_name', apache_note("GEOIP_COUNTRY_NAME"));
$smarty->assign('city_name', apache_note("GEOIP_CITY"));
$smarty->assign('region', apache_note("GEOIP_REGION"));
$smarty->assign('metro_code', apache_note("GEOIP_DMA_CODE"));
$smarty->assign('area_code', apache_note("GEOIP_AREA_CODE"));
$smarty->assign('latitude', apache_note("GEOIP_LATITUDE"));
$smarty->assign('longitude', apache_note("GEOIP_LONGITUDE"));
$smarty->assign('postal_code', apache_note("GEOIP_POSTAL_CODE"));
The above examples define your Smarty variables, such as $country_code, $country_name, $postal_code, etc.
To output values for the surfers' locations, enter the necessary Smarty code in the "HTML Source" field, found when editing an IM Popup in the Adtools Admin.
For example:
Welcome to {$country_name}Find other people in ($city_name}!


