Note: This article only applies to NATS version 4.1 and higher. If you wish to upgrade your installation of NATS in order to take advantage of this feature, please put in a support ticket.
NATS4.1 provides an Affiliate Login History page so that affiliates can easily keep track of any instances of their account logging into that NATS installation. This helps to provide an extra layer of security, as this feature can help ensure that you are the only one that has been logging into your NATS affiliate account by checking dates, days of the week, time, and login IPs.
You will find a list of all logins that occurred under your NATS4.1 affiliate account on this page, along with information regarding each recorded login.
Viewing Your Login History
You can find the Login History page in the "My Account" section in the top toolbar, found on any of the affiliate pages. Mouse over "My Account", and click the Login History link in the pop-down menu that appears.
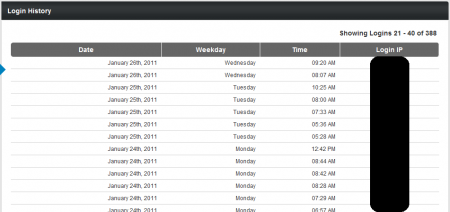
On the next page, you will find your affiliate login history in a table of all logins that occurred for your affiliate account. This table also contains a variety of information about each login, including:
- Date - Provides the calendar date that the recorded login occurred on.
- Weekday - Provides the day of the week that the recorded login occurred on.
- Time - Provides the exact time of day that the recorded login occurred on.
- Login IP - Displays the IP location that the specified login occurred from.

This page also allows you to change how many login records appear in the Login History table. To do so, locate the "Items per page" drop-down menu in the bottom-right corner of the page and choose how many items you want to be displayed. You can choose from 10 items, 25 items, 50 items, 100 items, or 250 items to be displayed here -- just select one of the available choices and click Update.
If you have more records of logging in than that on your account, you can also choose to show all of your login records on one page with the "Show All" setting. Again, just click Update once you choose your desired setting, and the Login History page will update itself to reflect your selection.
