Mallcom
Set up on Mallcom's Website
Create a Mallcom account. Record your Affiliate ID and your database's hostname, name, username, and password. If you don't get this information, please contact Mallcom before continuing.
Set up Mallcom in NATS
Third-Party Admin
Go to the Third Party Admin, select Mallcom from the drop-down, and click "Add". You will see the following form:
Enter the percentage or amount of money Mallcom keeps of each transaction in the "Biller Fees" section. Choose whether to pay the fees yourself (After Payout) or share the fees with your affiliates (Before Payout). Enter your Mallcom Affiliate ID and your Mallcom database's hostname (DB Host), name (DB DB), username (DB User), and password (DB Password).
Enter an affiliate's linkcode into the Default NATS Code box to track referrals sent to your NATS without an affiliate's linkcode. Filling this in ensures NATS tracks all traffic you send to Mallcom. Please see the Getting The NATSCode article for help getting a NATSCode.
Click save.
Sites Admin
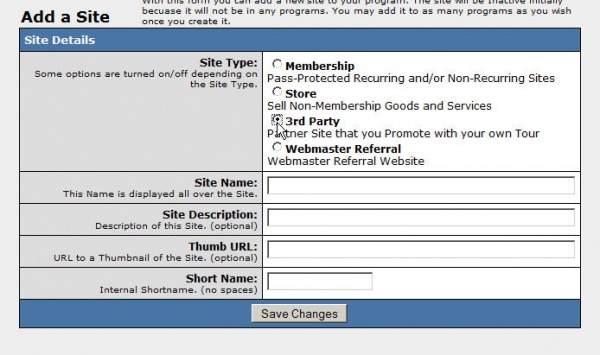
In the Sites Admin, click the Add a Site tab near the top. The following screenshot shows the Add a Site screen:
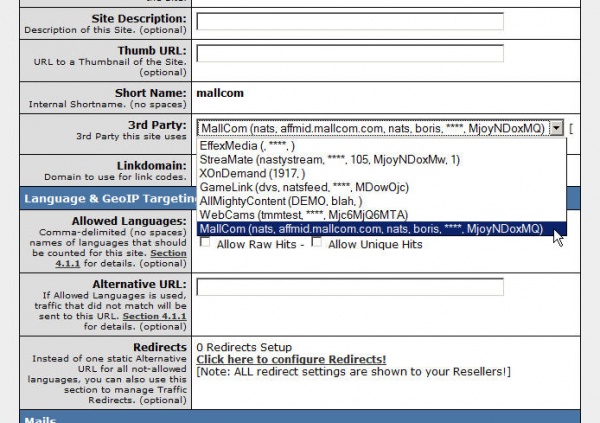
Choose a 3rd Party site, enter a Site Name, and a shortname. You may also enter a site description and thumbnail URL. Click Save Changes to display more options. The first new option lists all third parties set up in NATS. Choose Mallcom from this drop-down.
Enter your Mallcom linkdomain and scroll down to the section, Third Party Details. Tell NATS where to send surfers by filling in the MallCom URL field.
Programs Admin
In the Programs Admin you can add Mallcom to any Standard program you've already set up. (Note: you can't do this with most third-parties.)
Note: Third-parties do not notify NATS about new sales and sign-ups immediately -- there may be up to a 24-hour delay before NATS records third-party transactions.


