Site Sections
Adding or editing sections (pages) in CARMA can be done through the "Site Sections" area. You can get to Site Sections by going to the Sites Admin and clicking the "Manage Sections" icon next to the site you want to add a page to or edit a page for.
Clicking the "Manage Sections" icon will take you to the "Sites Admin - Configure Sections" page. Here, you will be able to add pages to your default page list, and edit the pages you currently have set up.
When you add a new site, two template sets will be created by default-- the "Member's Area Homepage" and the "Main Tour Page." You can see your list of currently configured sections in the "Manage Sections for Site:" area. Each section/page will have basic information displayed alongside it. This includes:
- ID - The section ID number. Used as an internal identifier.
- Section Name - The name your page will be identified by in CARMA.
- Description - A short description for your page. This will only be seen internally by CARMA admins.
The right-most column contains Action Icons that you can use to further customize and configure your sections. These action icons include:
- Edit - Edit basic information for your section (ID, Section Name, Description)
- Add - Add a new section following the currently existing section.
- Duplicate - Duplicate the selected section.
- Show Templates - Brings you to a list of templates for your section.
- Delete - Removes your section from the list. Note: This will permanently delete the specified selection from CARMA!
The Add icon (marked by a green plus sign) adds a new page under the page you clicked the icon for. Clicking the Add icon will prompt you to fill in a Section Name, and a Description for your page. Click Save, and your new page will be added to your Sections list.
Editing Your Templates
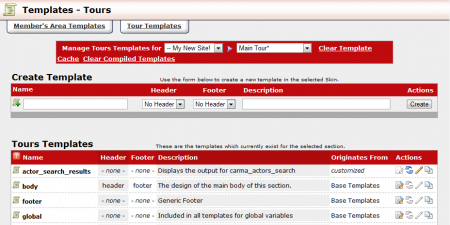
You can customize your page's look and feel by clicking the "Edit Templates" icon (marked by a scroll and a pencil). This will take you to your section's list of templates, where you will be able to customize a variety of areas in your section. This template list will be fully populated, as CARMA provides you with a set of Base Templates for you to use. If you wish to initially customize your base templates, click the "Customize" icon.
This will take you a page where you will be able to edit that template's code and customize the page to your liking. When you are done customizing your template, click "Save Template." When you are taken back to your list of templates, you will notice that the "Customize" icon has been grayed out, and the other icons are now available. You can choose to reset your template back to the default Base Template by clicking the "Revert" icon (displayed as two blue arrows), and further edit your template by clicking the "Edit" icon (displayed as a pencil).
You can also duplicate any of your currently existing templates by clicking the "Duplicate" icon (displayed as two sheets of paper). This is useful, as you can build a new page off of a previously existing one.
NOTE: Only duplicated templates can be deleted in CARMA.

