NATS5 Cascade Overview
The Cascade Overview is where you can find all specific cascade information, set up cascade steps and manage rules for 1 Cascade.
For more information on cascades, please see our NATS5 Cascades wiki.
Details Tab
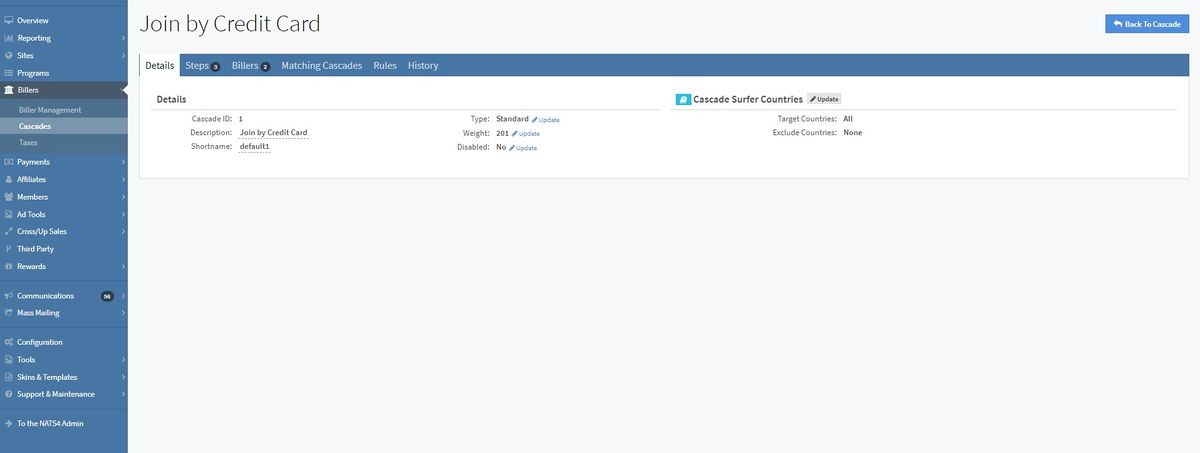
To view and edit information about a cascade, the Details Tab in the Cascade Overview is the page to do so. The page includes:
- Cascade ID: The ID for the cascade.
- Description: The text that is displayed on the NATS join form as the cascade description.
- If two or more cascades have the same description, only one is used on the join form based on the weight.
- Shortname: The unique identifier used for the cascade.
- Type: The type of cascade set, which affects how the cascade will act when used on a join form.
- Different types include Standard, Automatic Gateway One Step, and Hide Cascade.
- Weight: The weight of the cascade is multiple ways:
- When 2 cascades have the same description, NATS randomly picks between 1 of them for the pre-join form.
- When multiple cascades (with different descriptions) are available on the pre-join page, the Weight will control the order.
- Disabled: Indicates whether the cascade is enabled or disabled. This can be changed by clicking the "Update" link next to the field.
Cascade Surfer Countries
- Target Countries: The cascade will only be available to surfers coming from the selected countries.
- Exclude Countries: The cascade will not be available to surfers coming from the selected countries.
Note: These fields can be updated by clicking the "Update" button above each of the fields.
Steps Tab
The Steps Tab displays all of your cascade steps. Here, you can prioritize your steps by biller, processing type, targeted and excluded countries, or the type of step.
To set up which steps will occur first, last, or in any desired order, click and drag the step using the button all the way to the left of the step.
Adding a Biller Step
To add a biller step, click the "Add Biller Step" button at the top-right of the tab page. A widget will appear, where you will have to fill in the Biller and Processing Type. You can also fill in targeted and excluded countries, as well as set where the step should appear in the list as the first or last step in the cascade.
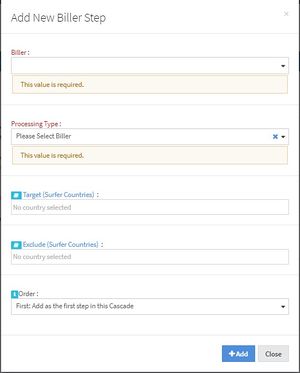
Once you are finished, click the "Add" button, and the step will appear in the Steps table with a "Biller" type.
Adding a Special Step
To add a special step, click the "Add Special Step" button next to the "Add Biller Step" button at the top-right of the tab page. A widget will appear, where you will have to fill in unique information for the special step.
Special cascade steps include:
- [Stop Cascade]: Stop executing the cascade.
- [Switch Cascade]: Switch from this cascade to another.
- [Show Template]: Shows a predetermined template on the site.
- [Redirect]: Sends the surfer to a designated web page.
You can also fill in targeted and excluded countries, as well as set where the step should appear in the list as the first or last step in the cascade.
Once you are finished, click the "Add" button, and the step will appear in the Steps table with a "Special" type.
Billers Tab
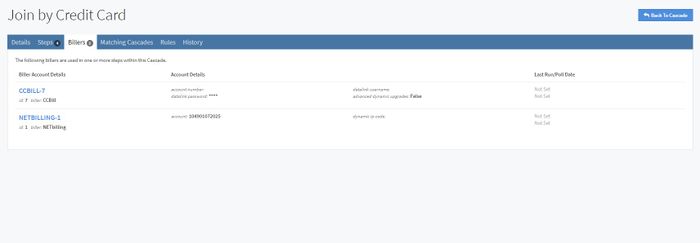
The Billers Tab displays all of the billers that are used in one or more steps within the cascade.
The list in the tab displays general biller information, including the biller ID, short name, the account details, and the last run/poll date.
Matching Cascades Tab
The Matching Cascades Tab displays all of the cascades that have the same description as the cascade you are viewing.
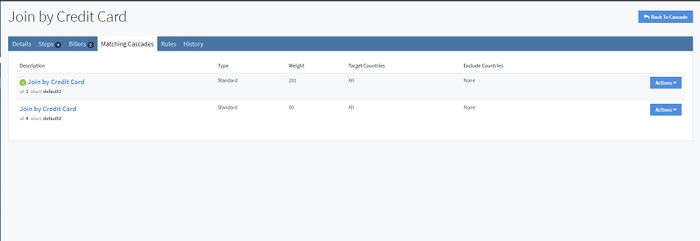
If a cascade has a green "C" next to its description, that is the current cascade in which you are currently accessing.
Clicking on another cascade's description will take you to that cascade's Cascade Overview, while clicking the "Actions" button and clicking "Cascade Overview" will do the same.
Rules Tab
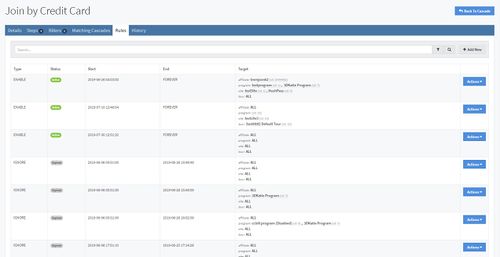
The Rules Tab shows all of the rules configured for the cascade. These rules allow you to enable/display this cascade for certain affiliates, programs, sites, times, and tours with the "ENABLE" rule. You can also choose to exclude certain affiliates, programs, sites, times, and tours from your cascade with the "DISABLE" rule.
Adding a New Rule
To add a new rule, click the "Add New" button at the top-right of the tab page.
You can choose to ENABLE, DISABLE, or IGNORE different target affiliates, programs, sites, or tours for a certain time period on this page. Once you are finished filling in all of the information, click the "Add Rule" button, and your new rule will appear in the Rules table.
To filter the results on the Rules table, click the button next to the magnifying glass. You can choose to include Enabled Rules, Disabled Rules, and/or Ignore Rules.
History Tab
This tab shows the history of changes made to the cascade.

The changes made to a cascade record the date of the change, the affiliate that performed it, the action, the cascade name, the cascade description, the cascade's weight, whether the cascade was deleted or not, the target countries, and the excluded countries.

