Difference between revisions of "NATS5 Walkthrough"
| (22 intermediate revisions by the same user not shown) | |||
| Line 330: | Line 330: | ||
Site Partners share in a specific site's revenue. Often site partners are affiliates with a special interest in a site; for example: a site devoted to an actress may have that actress as a site partner. NATS also gives site partners statistics about all of the site's activity. | Site Partners share in a specific site's revenue. Often site partners are affiliates with a special interest in a site; for example: a site devoted to an actress may have that actress as a site partner. NATS also gives site partners statistics about all of the site's activity. | ||
| − | You make affiliate site partners in the Affiliates Admin and you tell NATS which sites they're partners of in the [[Sites | + | You make affiliate site partners in the Affiliates Admin and you tell NATS which sites they're partners of in the [[NATS5 Site Management|Sites Management]]. For more information about Site Partners, please see the [[NATS5 Site Partner|Site Partner article.]] |
</div> | </div> | ||
| Line 396: | Line 396: | ||
== Admin Overview == | == Admin Overview == | ||
| − | ''For more information, please see [[ | + | ''For more information, please see [[NATS5 Admin Overview]]'' |
| − | The | + | The NATS5 Admin Overview shows you attractive charts and useful summaries of your program's recent activity. |
| − | [[Image:Admin-Overview. | + | [[Image:Admin-Overview-General.jpg|thumb|center|600px|Overview Graphs]] |
| − | The top of the page contains several tabs that allow you to change what periods you want to view your stats for (i.e., Today, Yesterday, This Week, This Year, etc.) | + | The top of the page contains several tabs that allow you to change what periods you want to view your stats for (i.e., Today, Yesterday, This Week, This Year, etc.). The boxes above the graphs in the top-left corner let you change the criteria used to generate the graph. |
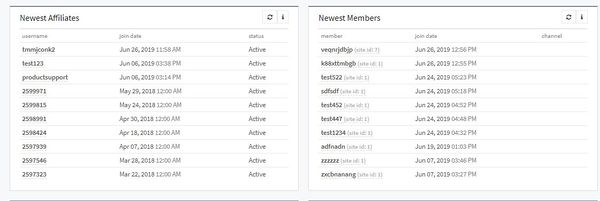
A list of newest [[Common Terms#Member|members]] appears besides the list of newest [[Common Terms#Affiliate|affiliates]]. | A list of newest [[Common Terms#Member|members]] appears besides the list of newest [[Common Terms#Affiliate|affiliates]]. | ||
| − | [[Image:Admin- | + | [[Image:Admin-Overview_New.jpg|thumb|center|600px|Newest Affiliates and Members]] |
| − | You can use the action | + | You can hover your mouse over each affiliate and member to display the option to go either the member's overview or the affiliate's overview. |
| + | |||
| + | == Affiliates Section == | ||
| + | ''For more information, please see [[NATS5 Affiliate Management]]'' | ||
| + | |||
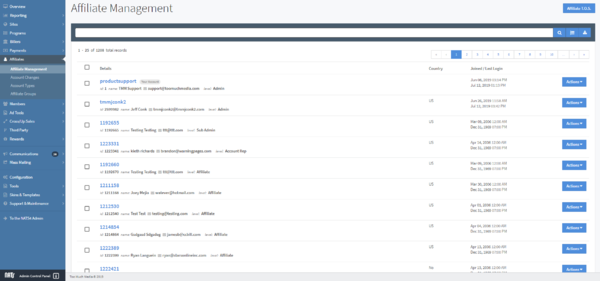
| + | Manage your affiliates in the Affiliate Management section. | ||
| + | |||
| + | [[File:Affiliate-Management_General.png|thumb|center|600px|The Affiliate Management]] | ||
| + | |||
| + | The top search bar lets you find specific affiliates. After you find | ||
| + | affiliates, the Affiliates list shows information about each matching | ||
| + | affiliate. Left of each Affiliate is a checkbox. Mark the | ||
| + | checkbox for several affiliates, scroll to the bottom of the page, and | ||
| + | use the Perform Action drop-down to manage each marked affiliate at the | ||
| + | same time. | ||
| + | |||
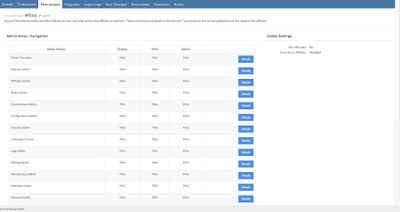
| + | You can edit an affiliate's permissions by going to the [[NATS5 Affiliate Overview|Affiliate's Overview]] and clicking on the permissions tab. | ||
| + | |||
| + | [[Image:Affiliate-Overview_Permissions.jpg|thumb|center|400px|Edit Affiliate Permissions]] | ||
| + | |||
| + | The Account Type section has seven options ordered from least access to most access: | ||
| + | * An '''Affiliate''' is a common affiliate. | ||
| + | * An '''Account Rep''' manages affiliates. | ||
| + | * A '''Customer Service Rep''' is a special affiliate who is responsible for managing customer service for your membership sites. | ||
| + | * A '''Site Partner''' shares site revenues and gets extra statistics. For more information, see the [[NATS5 Site Partner|Site Partner article]]. | ||
| + | * A '''Sub Admin''' has limited administrative access. | ||
| + | * A '''TMM Admin''' has full administrative access, but can only log in from the IP addresses specified by the TMM_ADMIN_IPS configuration option. | ||
| + | * An '''Admin''' has full administrative access. | ||
| + | |||
| + | You can customize the access permissions of users using the Permissions check boxes. Enabling a Display checkbox lets the affiliate | ||
| + | see that page. Enabling all actions in the Action column lets the affiliate perform any | ||
| + | action on that page; you can further restrict their access by clicking | ||
| + | the links in the specific column. | ||
| + | |||
| + | On the main Affiliate Management page, on the right of each affiliate is an "Actions" button with multiple options: | ||
| + | |||
| + | * The '''Affiliate Overview''' shows the affiliate's account information. For more information, see our [[NATS5 Affiliate Overview]] article. | ||
| + | * The '''Override as Affiliate''' action lets you override and take control of that affiliate's account. | ||
| + | * The '''Message Affiliate''' action lets you send a quick message to an affiliate. | ||
| + | * The '''Email Affiliate''' action will open your email to send an email to an affiliate. | ||
| + | * The '''Delete Affiliate''' action deletes the affiliate's account. | ||
| + | |||
| + | An override is an [[Common Terms#Admin (NATS)|admin's]] ability to temporarily become an existing [[Common Terms#Affiliate|affiliate]]. | ||
| + | Overriding as an affiliate doesn't affect the administration interface, but any changes made in the affiliate area change the affiliate's account. For more information, please see our [[NATS5 Affiliate Override]] article. | ||
| + | |||
| + | To manually add a sale to an affiliate, go to an Affiliate Management, find the affiliate, go to their overview, click on the "Payments" tab and then click on "Add Sale". Enter the manual sale details and click Save. '''Warning: you cannot remove a manual sale -- it's a real sale, and you must pay the affiliate for it.''' | ||
| + | |||
| + | == Members Section == | ||
| + | ''For more information, please see [[NATS5 Member Management]]'' | ||
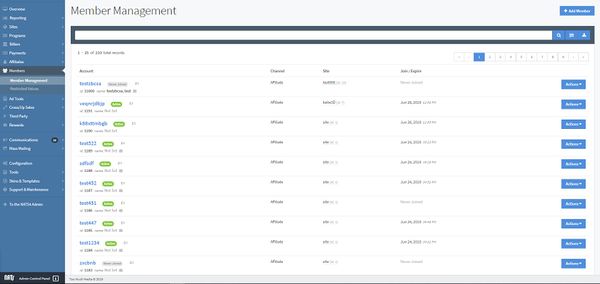
| + | You can manage your members in the Member Management section: | ||
| + | |||
| + | [[Image:Member-Management_General.jpg|thumb|center|600px|Member Management]] | ||
| + | |||
| + | You can add a new member to your database by clicking the Add Member button at the top-right of | ||
| + | the screen. | ||
| + | |||
| + | The top search box lets you find specific members. After you find | ||
| + | members, the Members list shows information about each matching member. | ||
| + | |||
| + | For each member, the only action in the "Actions" menu is to view a Member's details and view the [[NATS5 Member Overview|Member's Overview]]. | ||
| + | There, you can edit member details, and "delete" a member by changing their status or expiring their subscription. | ||
| + | |||
| + | You can add and see your restricted values by going to the Restricted Values under the Members section. Click the "Add New" button to add a new restricted value, and delete or search for members with that value by clicking the "Actions" button to the right of the value and choosing your action. | ||
| + | |||
| + | == Reporting Section == | ||
| + | |||
| + | Select the report you want to see by clicking on the "Reporting" section and choosing which report you wish to view. There are a variety of reports to choose from: | ||
| + | |||
| + | * The '''Profit & Loss''' report shows you program's profit and loss by day. | ||
| + | ** Under the Profit & Loss section also has an '''Additional Payout''' report, where you can see statistics about the Affiliate Referral Tier Payouts and Affiliate Referral Signup Payouts. | ||
| + | *** The Affiliate Referral Tier Payouts statistics displays vital statistics for affiliate referral tiers. | ||
| + | *** The Affiliate Referral Signup Payouts statistics displays how much you have paid affiliates who refer other affiliates. | ||
| + | * The '''Subscription''' report lists each of your consumer's purchases. | ||
| + | * The '''Transaction''' report lists each of your consumer's transactions. | ||
| + | * The '''Surfer Actions''' report lists what actions surfers have taken on your sites. | ||
| + | * The '''Affiliate Ratios''' report displays vital statistics for affiliate referral tiers. | ||
| + | |||
| + | [[Image:Profit-Loss_Summary.jpg|thumb|center|600px|Profit and Loss Graph]] | ||
| + | |||
| + | == Ad Tools Section == | ||
| + | ''For more information, please see [[NATS5 Ad Tool Management]]'' | ||
| + | |||
| + | |||
| + | The Ad Tool Managements lets you setup and manage your adtools, such as banners, hosted galleries, downloadable adtools, and feeds. | ||
| + | |||
| + | [[Image:Adtool-Management_General.jpg|thumb|center|600px|Ad Tool Management]] | ||
| + | |||
| + | The Adtool Categories list shows the name and category ID for each category. By clicking on the "Manage Categories" button at the top-right of the page, you can change the order of the categories and view disabled categories. By clicking on the gear button next to each category, you can either enable/disable a category or edit a category to change its name and description. | ||
| + | |||
| + | |||
| + | Each adtool category has one or more adtool types. On the right of each adtool type are several actions available when you click the "Actions" button: | ||
| + | * The '''Ad Tool Overview''' lets you edit and view adtool type information. | ||
| + | * The '''View Ad Tool Assets''' action displays all of your adtools in that are part of that ad tool type. | ||
| + | * The '''Duplicate''' action duplicates an adtool type. | ||
| + | * The '''Disable''' action deletes the adtool type. You can see deleted adtool types by clicking the Include Deleted Types filter after you click the "Filter" button. | ||
| + | |||
| + | You can click the View Ad Tool Assets action or the number displayed in the count box to view all adtools in this type. The actions for each ad tool are: | ||
| + | * '''Ad Tool Overview''': View the ad tool's overview and edit or view ad tool information. This can also be done by clicking the "i" button next to the Actions button. | ||
| + | * '''Delete Ad Tool''': Deletes the ad tool from this type. Deleted ad tools can be viewed by clicking the "Filter" button and choosing the "Include Deleted Ad Tools" option. | ||
| + | |||
| + | [[Image:Adtool-Management_Assets.jpg|thumb|center|600px|View Adtools]] | ||
| + | |||
| + | An adtool group lets you manage groups of adtools by something besides | ||
| + | category or type. For example, you can create an adtool group dedicated | ||
| + | to a specific product. Click the Groups section under the "Ad Tools" section on the left to manage and create ad tool groups. | ||
| + | |||
| + | [[Image:Adtool-Groups_General.jpg|thumb|center|600px|Ad Tool Groups]] | ||
| + | |||
| + | == Third Parties Section == | ||
| + | ''For more information, please see [[NATS5 Third Party Partner Management]]'' | ||
| + | |||
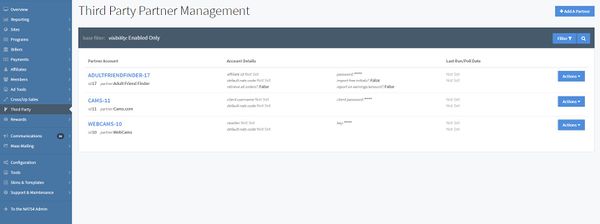
| + | The Third Party section of NATS | ||
| + | [[Image:Third-Party-Management_General.jpg|thumb|center|600px|The Third Party Management]] | ||
| + | |||
| + | To add a new third-party, click the "Add a Partner" button and pick a third-party partner from the drop-down menu. Once you have chosen the partner, click the "Add" button, and you will be redirected to the third-party partner overview, where you can edit account details, view polling details, and add or edit transaction charges and deduction fees. | ||
| + | |||
| + | After you add a third-party, you must setup a third-party site in the | ||
| + | Sites Management. Go to [[NATS5 Site Management|the Site Management page]], create a new site, choose a 3rd Party Site, and choose the third-party to use. | ||
| + | |||
| + | == Cross/Up Sales Section == | ||
| + | ''For more information, please see [[NATS5 Cross Sales]] and [[NATS5 Up Sales]]'' | ||
| + | |||
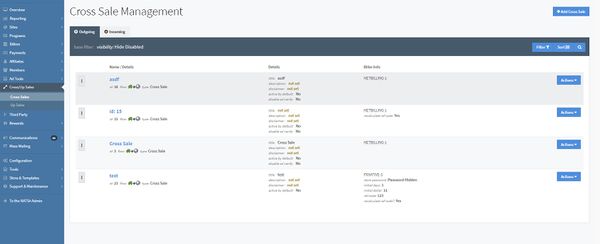
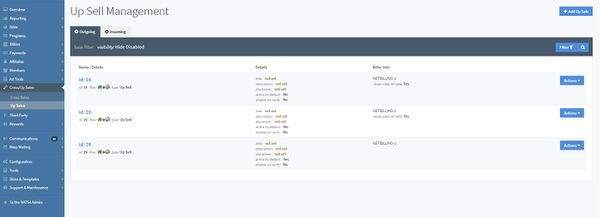
| + | The Cross Sale and Up Sell Management pages display and let you edit your up sells and cross sales. | ||
| + | A cross sell gets sent to a biller when a surfer submits your pre-join page and the biller displays the option for another site on their join page. | ||
| + | An up sell is an option the member can selected after they join your site. | ||
| + | |||
| + | |||
| + | [[Image:Cross-Sale-Management_General.jpg|thumb|left|600px|The Cross Sale Management]] | ||
| + | [[Image:Up-Sale-Management_General.jpg|thumb|right|600px|The Up Sale Management]] | ||
| + | |||
| + | |||
| + | <br><br><br><br><br><br><br><br><br><br><br><br><br><br><br> | ||
| + | You must add a biller that supports cross-sells in your [[NATS5 Biller Management]] first. To add an incoming or outgoing cross sell, click the Add buttons that appear at the top-right of each page. Fill out the corresponding information and click "Save Changes". | ||
| + | |||
| + | == Mass Mailing Section == | ||
| + | ''For more information, please see [[NATS5 Mailing Management]]'' | ||
| + | |||
| + | <div class="def_box"> | ||
| + | <span class="title">Adding Linkcodes to Emails</span> | ||
| + | |||
| + | NATS lets you automatically generate affiliate linkcodes when you send emails to affiliates using the [[nats_list_linkcodes]] template function. You can [[List_linkcodes#Listing_Linkcodes_in_an_Email|list linkcodes in an email]] or [[List_linkcodes#Inserting_the_natscode_in_an_Emailed_Tour_Link|automatically append the natscode to an emailed tour link]]. | ||
| + | |||
| + | For more information, see the [[nats_list_linkcodes|nats_list_linkcodes article]]. | ||
| + | </div> | ||
| + | |||
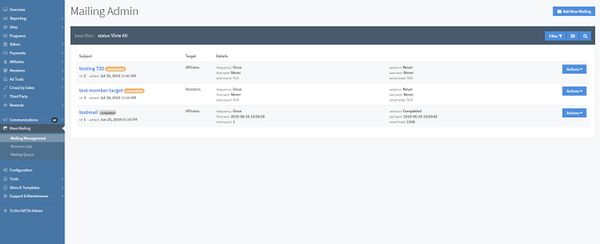
| + | The Mailing Management is a section of NATS that allows you to send automated emails to your affiliates and members. | ||
| + | |||
| + | [[Image:Mailing-Management_General.jpg|thumb|center|600px|The Mailing Management]] | ||
| + | |||
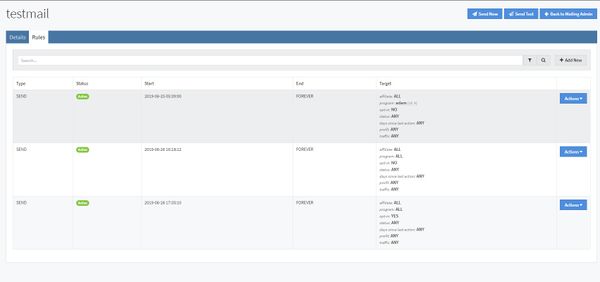
| + | The Mailing Management list displays information about each mailer, including the subject, target, details, and if they have been completed or are still unscheduled. The actions for each mailer include: | ||
| + | * The '''Mailer Overview''' displays mailer information, rules, and if it is unscheduled, gives you the option to send a test email to yourself or send the mail to the listed members or affiliates. | ||
| + | * The '''Delete Mail''' icon deletes this email. | ||
| + | |||
| + | |||
| + | [[Image:Mailing-Management_Rules.jpg|thumb|center|600px|Set Display Rules]] | ||
| + | |||
| + | You can prevent NATS from sending email to affiliates and members who don't want to receive your email. To do so, click on the Remove Lists section under Mass Mailing and enter affiliate or members email addresses into the remove list boxes. No matter what display rules you set, none of these affiliates or members will receive a mailing from NATS. | ||
| + | |||
| + | == Communications Section == | ||
| + | ''For more information, please see look at the NATS5 sections on the right side of this page and expand the Communications section.'' | ||
| + | |||
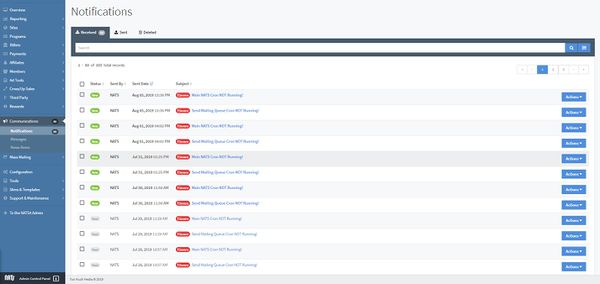
| + | The NATS5 Communications has a Notifications section , Messages section, and News Items section lets you send news items to all of your affiliates or notifications to specific affiliates. | ||
| + | |||
| + | [[Image:Notifications_General.jpg|thumb|center|600px|Notifications List]] | ||
| + | |||
| + | All affiliates receive news; NATS displays the most recent news item at the top of their Affiliate Overview page. To create a new news item, go to the News Item section and click "Add News Item". Enter your news item's subject, section, body, and choose a display date. | ||
| + | |||
| + | Notifications act like emails. You can send a notification to specific affiliates or all affiliates, and affiliates can read the notification and then delete it. NATS displays the number of new notifications at the top-right of every affiliate page. Clicking on the number of new notifications or going to the Messages tab of My Account shows the affiliate their list of received and sent notification. | ||
| + | |||
| + | To send a new message, go to the Messages section and click "Send Message". Enter the subject and body of your message. In the Send To field, enter an affiliate's username or enter ALL to send the message to all affiliates. | ||
| + | |||
| + | You can also search notifications, as well as seeing what notifications have been sent to you, and what notifications you have sent out to your members or affiliates, through the "Notifications" tab at the top of the page. | ||
| + | |||
| + | == Support and Maintenance Section == | ||
| + | ''For more information, please see [[NATS5 Cleanup Database]]'' | ||
| + | |||
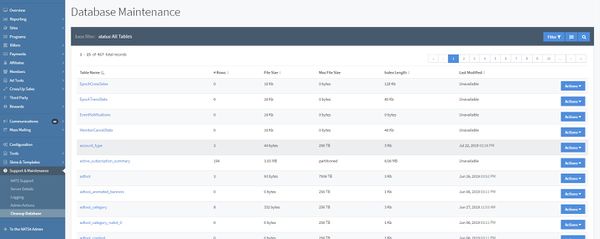
| + | The Support and Maintenance section has different sections that lets you remove old information from your NATS database and logs. As a failsafe measure, you cannot remove information vital to payments, payouts, or statistics. All database cleanings make a SQL-formatted backup of the data to be removed and place it in the NATS/backups directory. Cleanup of a large amount of files can take a long time to run, so we recommend you regularly cleanup your logs. | ||
| + | |||
| + | You can also view NATS information, including the license and NATS version information. | ||
| + | |||
| + | [[Image:Cleanup-Database_General.jpg|thumb|center|600px|Cleanup Database]] | ||
| + | |||
| + | Tables that should be cleaned soon will be indicated next to the table name. Clean a table by clicking on the table overview from the "Actions" menu on the right, and click the "Clean Table" button. | ||
| + | |||
| + | |||
| + | |||
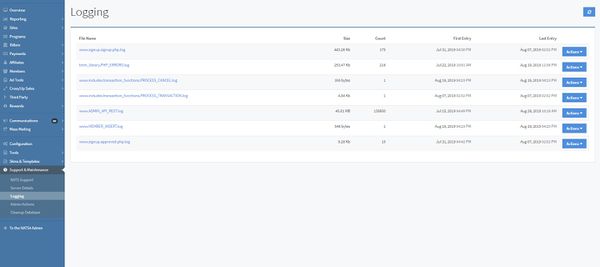
| + | Here you will also find the Logging Section, which lets you view information logged by NATS. Before any information appears here, you must enable logging in the Configuration Section. | ||
| + | |||
| + | [[Image:Logging_General.jpg|thumb|center|600px|Logging]] | ||
| + | |||
| + | Each log has the available actions: | ||
| + | * The '''View Log''' action lets you view the log with detailed information. | ||
| + | * The '''Clean Up Log File''' action will clean up the log, where you can choose to cleanup by the number of rows or a date and keep a number of rows or rows before a specific date. | ||
| + | * The '''Delete Log''' action will delete the log. | ||
| + | |||
| + | == Configuration Section == | ||
| + | ''For more information, please see [[NATS5 Configuration]]'' | ||
| + | |||
| + | The Configuration section lets you manage your NATS configuration settings. It is not necessary to set up this Admin, as the default settings provided by your NATS install should work with your site. You should be certain of what you are doing before you edit these settings, as it is possible to cause internal problems when changing some settings. | ||
| + | |||
| + | [[Image:Configuration_General.jpg|thumb|center|600px|The Configuration Section]] | ||
| + | |||
| + | The NATS configuration admin works in conjunction with the NATS configuration file. The configuration file is stored in the NATS directory on your server as includes/config.php. | ||
| + | |||
| + | Several tabs let you find configuration options: | ||
| + | * The '''Home''' options are the primary NATS settings. Some options can't be edited; if you need these options changed, please [http://clients.toomuchmedia.com submit a ticket]. | ||
| + | * The '''Security''' options configure who can access secure areas of your NATS program. Be careful editing these settings: you can easily lock yourself out. | ||
| + | * The '''Fraud''' options allow you to configure your fraud detection settings. | ||
| + | * The '''Billers''' options provides very specific options for further configuring your billers. | ||
| + | * The '''Email''' options tell NATS when to send emails, as well as the subjects of the emails and what address to send them from. NATS only sends email if you enter a subject in any of the fields. | ||
| + | * The '''Affiliates''' options let you set affiliate requirements, as well as what is displayed to them on the main Affiliates page. | ||
| + | * The '''Currency''' options change the exchange rate or how currency is displayed. Currency exchange rates must be manually set up here. | ||
| + | * The '''Cronjobs''' options change how NATS does scheduled tasks. | ||
| + | * The '''Logging''' options change what NATS logs. | ||
| + | * The '''Display''' options affect what will be displayed in admin areas and reports. | ||
| + | |||
| + | For a description of important options, please see the [[NATS5 Configuration Options|Configuration Options article]]. | ||
Latest revision as of 14:23, 11 October 2019
Main Affiliate Screen
NATS Remote Backup
Your business depends on your affiliate and sales data. If you lose that, you could lose everything. Hosts sometimes provide backup service, but to be safe as possible, Too Much Media offers a NATS data backup service. We will backup all of your NATS database data and templates to our server three times a week and, if your hard drive crashes or you lose data, we reinstall NATS and re-import all of your data at no extra cost.
For more information, please submit a ticket.
Customizing the Affiliate Area
The affiliate area described in the next few sections is fully customizable. You can add your own log, change the page layout, add or remove statistics, and add or remove whole pages. You can change the superficial page appearance by editing the CSS file; you can change page contents in the Skins and Templates Admin described below.
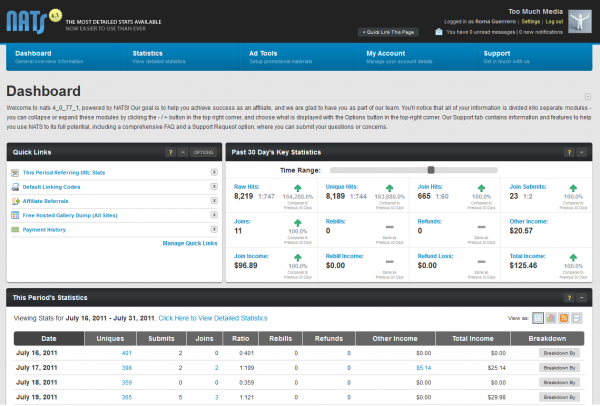
Affiliates see the main affiliate screen when they login to NATS. Like all NATS pages, you can completely customize its layout.
The links on this page take you to the pages described below. The graphs show the affiliate's promotional progress.
Affiliate Stats
What's an Affiliate Referral Program?
Affiliate referral programs, also known as Webmaster Referral Programs, let affiliates refer other affiliates to your program. The referring affiliate gets paid a percentage for all of the referred affiliate's sales.
For example: Affiliate Alice signs up Affiliate Bob; Alice earns 10% of Bob's sales. Affiliate Bob signs up Affiliate Conrad; Bob earns 10% of Conrad's sales and Alice earns 2% of Conrad's sales. In this setup, Bob is Alice's first tier, and Conrad is Alice's second tier. You can have up to eight tiers and you can pay a different percentage for each tier.
For more information, please see the Affiliate Referrals article.
What's a Campaign?
Campaigns let each individual affiliate track their traffic in their own way. Affiliates tag their referrals by assigning a campaign to their referral links. NATS records the incoming campaign tag and lets affiliates breakdown their campaign statistics on the Affiliate Statistics page.
For example: an affiliate creates two campaigns -- one for each of their sites. Now the affiliate can compare the performance of those two sites.
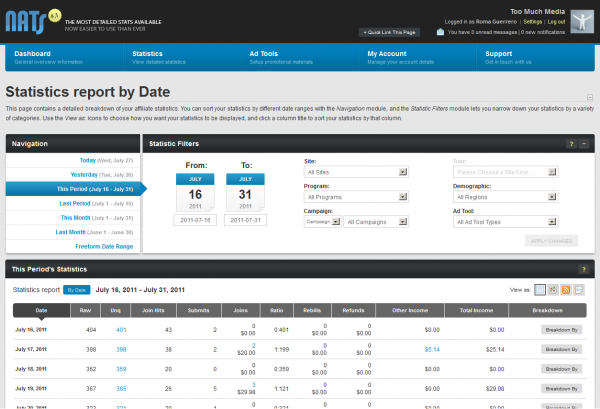
The affiliate statistics page gives affiliates all the statistical tools they need to analyze and improve their promotions.
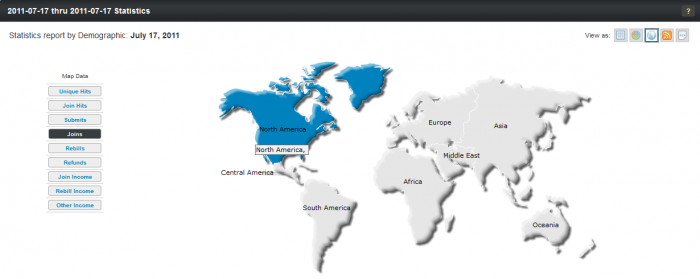
The report lets affiliates get detailed statistical information in an easy-to-use interface. It groups traffic into a dozen different views. For example, the demographics view (illustrated below) lets affiliates view statistics on a continental, regional, or national basis, and the affiliate can compare traffic from several countries side-by-side.
Similarly, the Statistics report also allows affiliates to "breakdown" performance data by date, site, program, campaign, traffic tag, ad tool, and referring URL.
Affiliates can customize their default view to include whatever statistical reports they find most useful. The right side of the default view shows summaries of the affiliate's site, program, campaign, and adtool activity.
Affiliate Adtools
What's a Linkcode?
Linkcodes are referral URLs tracked by NATS, Linkcodes can be used directly by affiliates or NATS can embed the linkcode in an adtool for the affiliate.
What Are Downloadable Adtools?
Affiliates download your downloadable adtools and put them on their websites. For example, you can turn a video into a downloadable adtool.
Adding downloadable adtools is easy in NATS. For details, please see the NATS5 Adtools Management.
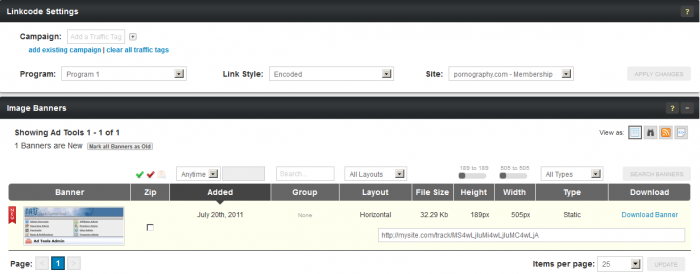
The Affiliate Adtools page lets affiliates get linkcodes and adtools for promoting your sites. You can access the Affiliate Adtools section by clicking the "Tools" link at the top of the page. Its simple tab-based navigation lets affiliates quickly find the type and style of adtool they want and then choose from a list of matching adtools.
The "Linkcode Settings" section lets affiliates choose which site and program to get adtools for. You can also select whether you want your NATS linkcodes to be encoded, un-encoded, or if you want them to display shortnames.
The adtools page comes setup for the most common adtool types, but you can add your own custom types (for example: page peels) very easily.
Affiliate My Account
Overriding Affiliates
You can change an affiliate's settings by overriding that affiliate. When you override an affiliate, you temporarily become that user; you can get their linkcodes, view their statistics, or adjust their account.
To learn how to override an affiliate, please see our NATS5 Affiliate Override wiki.
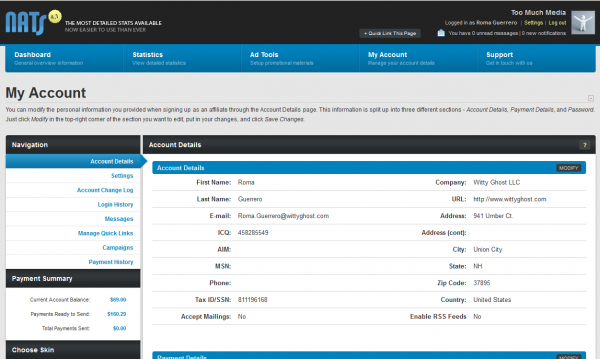
The Affiliate My Account page lets the affiliate change their account information, preferences, and send and receive messages. The eight in the "Navigation" box let the affiliate navigate between their settings.
- The Account Detail tab lets the affiliate change their account information
- The Settings tab lets the affiliate customize his default layout, as well as edit e-mail and notification settings
- The Account Change Log tab provides a detailed history of changes you have made to your account
- The Login History tab provides a detailed history of login activity to your account
- The Messages tab shows all sent/received messages and notifications
- The Manage Quick Links tab allows you to remove or change the order of the quick links that appear on the Dashboard
- The Campaigns tab lets the affiliate create or edit campaigns
- The Payment History tab shows a detailed report of payments that are owed to the affiliate, the payment method, and whether or not the payment has been stored/paid yet
Using the account settings tab, the affiliate can prevent anyone from changing their payment information with the affiliate confirming the change through email.
Affiliate Support
Using Account Reps
Account Representatives help you manage your affiliates so that you can manage your business. Account representatives get to see statistics for the affiliates they manage. They can send news and notifications to their affiliates and receive support requests. You can even pay account representatives a percentage of their affiliate's income.
To create an account representative, please see the Account Representatives article.
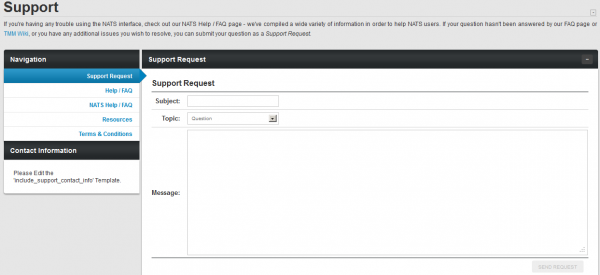
We made the support page easy for you to customize so that you can give your contact information and support links to affiliates. Customizing this page is easy in the Skins and Templates Admin.
Skins and Templates
For more information, please see NATS5 Skins and Templates Available Skins
Other Templates
You can find most of NATS's templates in the Skins and Templates section, but certain templates are found elsewhere in the NATS admin area. For example, the Site Templates are specific to each tour. They include the most customized template in NATS: the Join Template. You can edit the Site Templates in the Tour Overview.
You can customize the look and feel of your affiliate program using the
Skins and Templates section. A Skin is a set of templates that work together to provide your affiliates with a consistent user interface.
NATS comes with the default skin you see in the affiliate area and you
can create as many of your own skins as you want.
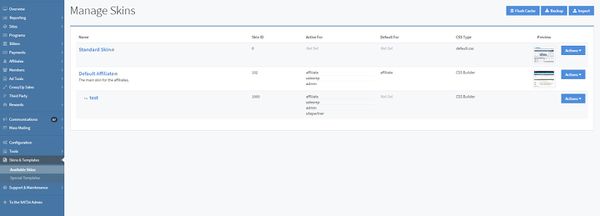
You will not be able to edit the default NATS skin. This is a failsafe measure, as you will always be able to revert to the default skin if you lose your other code. You can create a new skin by pressing the "Actions" button next to an existing skin and clicking Add New Skin. A new skin inherits the properties of the skin above it with less indenting -- the parent skin -- and each template in the skin retains its parent's properties until you customize the child's template the first time. Click the "Edit Skin Settings" option to change the skin's name, description, and who can use this skin.
Clicking on "Available Skins" in the Skins and Templates section and clicking on any of your skins will show you a list of your skin's templates. The templates follow a specific naming scheme:
- The admin_ templates display administrative areas
- The affiliate_ templates display the affiliate areas
- The external_ templates display the public areas that don't require a login
- The function_ templates support the other templates
- The includes_ templates work with the Includes Section
- The mail_ templates generate email bodies
To edit a template for the first time, press the "Actions" button next to the template in the desired skin and click "Customize Template". There are several other actions to let you work with the template, which are displayed when clicking the "Actions" button next to the template:
- The "Revert to Original" option throws away your changes and restores the child template to a duplicate of its parent
- The "Edit Template" option lets you edit a template after you customize it
- The "Duplicate Template" option lets you duplicate a template
- The "View Template" option previews the template for you. Note: This preview won't contain any dynamic information the template expects, so a correctly coded template may display incorrectly.
Back on the Available Skins page, there are Import and Backup buttons that let you add a template from your computer or save a template to your computer. You can also change the default skin for the different user types. You can also flush the template cache by clicking the "Flush Cache" button; click this button if your templates are not displaying correctly.
Billers Section
For more information, please see NATS5 Biller Management
Biller Setup Instructions
Since each biller has different settings you must configure and optional settings you may have configured, we have separated the biller instructions into a different article for each biller. For example, we have an article each for CCBill, Epoch, and Netbilling.
You can find the complete list of instructions in the right-side wiki menu of the Billers Admin entitled Biller Instructions.
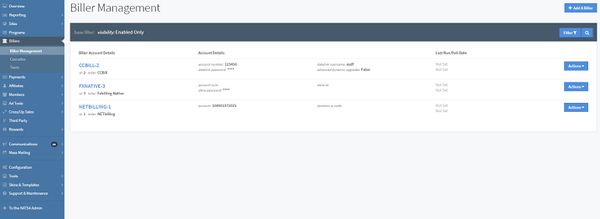
The Biller Management page is where you add and modify the settings for your payment processors.
To add a new biller, click the "Add A Biller" button at the top of the Biller Management page, choose your biller, and click "Add". (For a more thorough description, please see the Biller Management article)
After you add a biller, you will need to add a cascade to be associated with the biller. For information on how to do this, visit our Cascades wiki. Once you have created a wiki, you will have to create a step for that biller in the cascade, which will the associate the biller with the cascade.
Cascades increase the probability that a surfer will sign-up by adding an extra step to the sign-up process:
- A surfer visits your tour page
- They decide to join and fill out your pre-join form
- NATS sends them to the first biller in the cascade
- If the biller approves them, NATS makes them a member
- If the biller doesn't approve, NATS sends them to the next biller in the cascade
NATS keeps sending the surfer to new billers until there are no more billers in the cascade. You can edit the cascade to find the following options:
- Cascade weight: how often should NATS choose this cascade over other cascades with the same name?
- Automatic cascades: should NATS send the surfer straight to the first biller in this cascade without trying to collect any information beforehand?
- Hide cascade: don't let surfers choose this cascade; you can manually choose hidden cascades for surfers
- Target/excluded: let or forbid surfers from these countries from accessing this cascade
The custom cascade rules let you choose when to show this cascade to surfers. The first matching rule takes precedence over all over rules.
When adding a biller to a cascade, there are a few special options:
- Stop cascade: when the surfer gets to this step, NATS shows them the denial template
- Switch cascade: when the surfer gets to this step, NATS sends them to the top a different cascade you choose. You can use this rule to send them to a hidden cascade. You can also use this to switch biller payment methods (ex. if a surfer's credit card gets rejected, send them to a check payment processor)
- Show template: when the surfer reaches this step, NATS sends them to a template you choose
- Redirect: when the surfer reaches this step, NATS sends them to any URL you choose
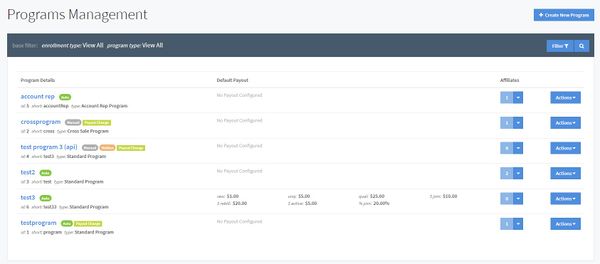
Programs Section
For more information, please see NATS5 Programs Management
Shortname Rules
NATS keeps track of programs, sites, and many other things using shortnames. Each shortname must be unique within the NATS program and may not contain spaces or special characters.
Good Shortnames
- my_program
- program1
Bad Shortnames
- my program
- program#1
NATS uses programs to define how affiliates get compensated for referrals, such as page hits, member joins, and rebills.
You have the option to create a program with automatic enrollment or manual enrollment. A program with automatic enrollment set will automatically enroll all new affiliates in the program, but not current affiliates. A new program with manual enrollment set needs affiliates to be manually added to the program. Affiliates will not be able to choose which program they will be enrolled in.
Note: If you want to create a new program that will have all current and new affiliates enrolled, you must create a new program set to manual enrollment, and then update the program to set it to automatic enrollment.
A new program requires a name, shortname, a type, and the kind of affiliate enrollment option. The name is displayed to affiliates, the shortname is used by NATS as an internal identifier, and the program type defines how affiliates get paid.
- A Standard Program promotes membership sites
- A Cross Sale Program promotes cross sells between your program and other programs
- A CCBill-Paid Program bills your customers using CCBill and pays your affiliates using CCBill
- An Affiliate Referral Program pays your affiliates for referring other affiliates (up to two tiers)
- An Affiliate Referral 8 Tiers Program pays your affiliates for referring other affiliates (up to eight tiers)
- An Account Rep Program lets you pay account representatives for managing affiliates
On the main Program Management page, each program has several actions available by clicking the "Actions" button:
- Program Overview: Access the program's Program Overview. For more information, please see our NATS5 Program Overview wiki.
- Switch to Manual Enrollment or Automatic Enrollment: These options will be available depending on what kind of enrollment option the program already is set to. A automatic enrollment program will have the "Switch to Manual Enrollment" option, and a manual enrollment program will have the "Switch to Auto Enrollment" option.
- "Delete, Remove and Redirect": Delete the program, redirect all traffic connected from the program to a new standard program, and enroll all affiliates currently associated with the program to the new program.
You can create standard permanent payout changes, temporary payout changes, tiered payout changes that pay affiliates for sending more than a specific amount of traffic, or recurring payout changes that happen on a schedule. For more information, see the Payout Changes article.
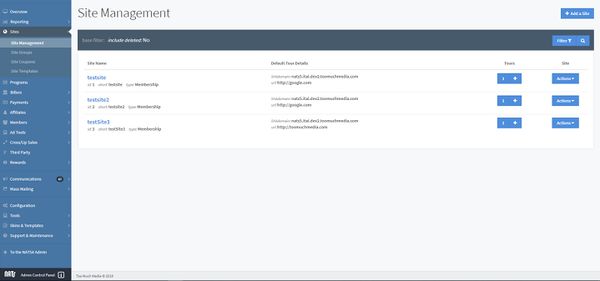
Sites Admin
For more information, please see NATS5 Site Management
What's a Site Partner?
Site Partners share in a specific site's revenue. Often site partners are affiliates with a special interest in a site; for example: a site devoted to an actress may have that actress as a site partner. NATS also gives site partners statistics about all of the site's activity.
You make affiliate site partners in the Affiliates Admin and you tell NATS which sites they're partners of in the Sites Management. For more information about Site Partners, please see the Site Partner article.
The Sites section allows you to set up and configure a site in NATS for each website you want to promote.
Click the "Add a Site" button to add a site. There are several different types of sites:
- A Membership site sells subscriptions.
- A Token site lets surfers buy tokens to use features on the site.
- A Store site sells non-membership goods and services.
- A Third Party site lets surfers by a membership to a third-party site.
- An Affiliate site lets affiliates refer other affiliates.
Next to each site on the main Sites Management page is list of some tour details and a number indicating how many tours are in that site. Click on the number of tours to see the tours for that site, and click on the tour to see its details.
- The URL is where surfers start the tour
- The Linkdomain is the domain linkcodes point at
Activate the billers for this tour by entering their biller-specific
settings, such as merchant ID, passwords, etc. in the Biller Tab of the Tour Overview. These settings must be obtained from the biller themselves.
You add join options to a site by going to the Join Options Tab on a Site Overview and clicking the "Add Site Option" button. There are three checkboxes:
- The 'Hide on Join Form lets you add a join option that will not be displayed on your tour's join form.
- The Disallow for Old Members checkbox lets you forbid previous members from using the free trial again.
- The Active by Default puts this option on all of this site's tours.
Enter the join option's prices and join form text and then enter the join option-specific settings in the Biller Codes section.
After you create a join option, you can edit it on the Join Option Overview, which will be the page you are redirected to after you create the join option. You can also change the Join Option Rules, which determine when the join option is shown to surfers.
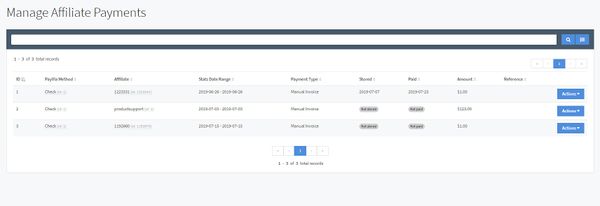
Payments Section
For more information, please see NATS5 Search Payments
NATS5 has multiple different areas where you can customize and manage affiliate payments under the "Payments" section. Under the Payments section, you can see payments that are due/stored, search and manage all affiliate payments, and view and edit your dump formats and payout periods, as well as make bulk payments to affiliates.
The Payments Due / Stored section lists payments that are ready to be sent out to affiliates if they are stored, as well as if they have been paid yet. In the stored section, you can view, edit, or pay a payment. Click the Actions button next to a payment and click the View Payment Dump option to view the payment in dump form. While viewing the payment, you can copy and paste the output into a payment processor. You can also edit payments, unstore payments, and mark them as paid.
The Pay Via Methods and Dump Formats sections let you configure how to pay affiliates.
Click the Pay Via Methods section to change the payment types available to affiliates. Each list item describes a payment method offered by NATS. Clicking on the Pay Via Method will redirect you to the Pay Via Overview, where you can edit the Pay Via's settings and options. Instructions for editing the Pay Via Options are in the NATS5 Pay Via Methods wiki.
Click the Dump Formats section to change the payment output format you download and submit to the payment processor. Instructions for editing and using dump formats are in the NATS5 Dump Formats wiki.
NATS lets your affiliates get instant payments using the integrated
automatic payment systems. You may individually specify which affiliates
may use instant payments.
Instant payment only work for full days of sales, but an affiliate can get an instant payment for any full day of sales even if they don't reach the minimum payout amount. At the end of the period, NATS sets up payments normally.
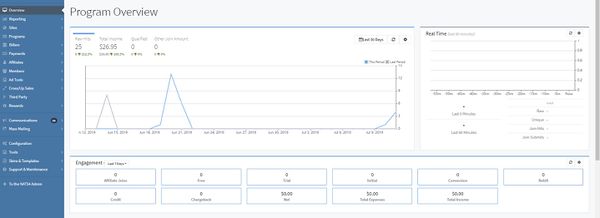
Admin Overview
For more information, please see NATS5 Admin Overview
The NATS5 Admin Overview shows you attractive charts and useful summaries of your program's recent activity.
The top of the page contains several tabs that allow you to change what periods you want to view your stats for (i.e., Today, Yesterday, This Week, This Year, etc.). The boxes above the graphs in the top-left corner let you change the criteria used to generate the graph.
A list of newest members appears besides the list of newest affiliates.
You can hover your mouse over each affiliate and member to display the option to go either the member's overview or the affiliate's overview.
Affiliates Section
For more information, please see NATS5 Affiliate Management
Manage your affiliates in the Affiliate Management section.
The top search bar lets you find specific affiliates. After you find affiliates, the Affiliates list shows information about each matching affiliate. Left of each Affiliate is a checkbox. Mark the checkbox for several affiliates, scroll to the bottom of the page, and use the Perform Action drop-down to manage each marked affiliate at the same time.
You can edit an affiliate's permissions by going to the Affiliate's Overview and clicking on the permissions tab.
The Account Type section has seven options ordered from least access to most access:
- An Affiliate is a common affiliate.
- An Account Rep manages affiliates.
- A Customer Service Rep is a special affiliate who is responsible for managing customer service for your membership sites.
- A Site Partner shares site revenues and gets extra statistics. For more information, see the Site Partner article.
- A Sub Admin has limited administrative access.
- A TMM Admin has full administrative access, but can only log in from the IP addresses specified by the TMM_ADMIN_IPS configuration option.
- An Admin has full administrative access.
You can customize the access permissions of users using the Permissions check boxes. Enabling a Display checkbox lets the affiliate see that page. Enabling all actions in the Action column lets the affiliate perform any action on that page; you can further restrict their access by clicking the links in the specific column.
On the main Affiliate Management page, on the right of each affiliate is an "Actions" button with multiple options:
- The Affiliate Overview shows the affiliate's account information. For more information, see our NATS5 Affiliate Overview article.
- The Override as Affiliate action lets you override and take control of that affiliate's account.
- The Message Affiliate action lets you send a quick message to an affiliate.
- The Email Affiliate action will open your email to send an email to an affiliate.
- The Delete Affiliate action deletes the affiliate's account.
An override is an admin's ability to temporarily become an existing affiliate. Overriding as an affiliate doesn't affect the administration interface, but any changes made in the affiliate area change the affiliate's account. For more information, please see our NATS5 Affiliate Override article.
To manually add a sale to an affiliate, go to an Affiliate Management, find the affiliate, go to their overview, click on the "Payments" tab and then click on "Add Sale". Enter the manual sale details and click Save. Warning: you cannot remove a manual sale -- it's a real sale, and you must pay the affiliate for it.
Members Section
For more information, please see NATS5 Member Management You can manage your members in the Member Management section:
You can add a new member to your database by clicking the Add Member button at the top-right of the screen.
The top search box lets you find specific members. After you find members, the Members list shows information about each matching member.
For each member, the only action in the "Actions" menu is to view a Member's details and view the Member's Overview. There, you can edit member details, and "delete" a member by changing their status or expiring their subscription.
You can add and see your restricted values by going to the Restricted Values under the Members section. Click the "Add New" button to add a new restricted value, and delete or search for members with that value by clicking the "Actions" button to the right of the value and choosing your action.
Reporting Section
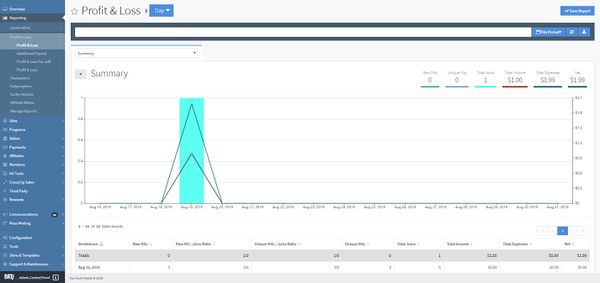
Select the report you want to see by clicking on the "Reporting" section and choosing which report you wish to view. There are a variety of reports to choose from:
- The Profit & Loss report shows you program's profit and loss by day.
- Under the Profit & Loss section also has an Additional Payout report, where you can see statistics about the Affiliate Referral Tier Payouts and Affiliate Referral Signup Payouts.
- The Affiliate Referral Tier Payouts statistics displays vital statistics for affiliate referral tiers.
- The Affiliate Referral Signup Payouts statistics displays how much you have paid affiliates who refer other affiliates.
- Under the Profit & Loss section also has an Additional Payout report, where you can see statistics about the Affiliate Referral Tier Payouts and Affiliate Referral Signup Payouts.
- The Subscription report lists each of your consumer's purchases.
- The Transaction report lists each of your consumer's transactions.
- The Surfer Actions report lists what actions surfers have taken on your sites.
- The Affiliate Ratios report displays vital statistics for affiliate referral tiers.
Ad Tools Section
For more information, please see NATS5 Ad Tool Management
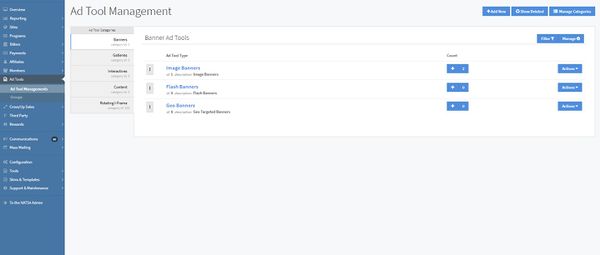
The Ad Tool Managements lets you setup and manage your adtools, such as banners, hosted galleries, downloadable adtools, and feeds.
The Adtool Categories list shows the name and category ID for each category. By clicking on the "Manage Categories" button at the top-right of the page, you can change the order of the categories and view disabled categories. By clicking on the gear button next to each category, you can either enable/disable a category or edit a category to change its name and description.
Each adtool category has one or more adtool types. On the right of each adtool type are several actions available when you click the "Actions" button:
- The Ad Tool Overview lets you edit and view adtool type information.
- The View Ad Tool Assets action displays all of your adtools in that are part of that ad tool type.
- The Duplicate action duplicates an adtool type.
- The Disable action deletes the adtool type. You can see deleted adtool types by clicking the Include Deleted Types filter after you click the "Filter" button.
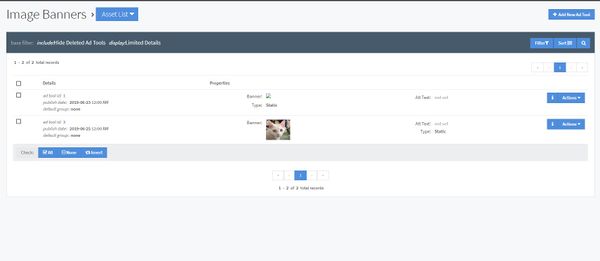
You can click the View Ad Tool Assets action or the number displayed in the count box to view all adtools in this type. The actions for each ad tool are:
- Ad Tool Overview: View the ad tool's overview and edit or view ad tool information. This can also be done by clicking the "i" button next to the Actions button.
- Delete Ad Tool: Deletes the ad tool from this type. Deleted ad tools can be viewed by clicking the "Filter" button and choosing the "Include Deleted Ad Tools" option.
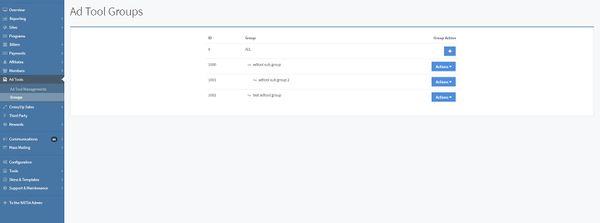
An adtool group lets you manage groups of adtools by something besides category or type. For example, you can create an adtool group dedicated to a specific product. Click the Groups section under the "Ad Tools" section on the left to manage and create ad tool groups.
Third Parties Section
For more information, please see NATS5 Third Party Partner Management
The Third Party section of NATS
To add a new third-party, click the "Add a Partner" button and pick a third-party partner from the drop-down menu. Once you have chosen the partner, click the "Add" button, and you will be redirected to the third-party partner overview, where you can edit account details, view polling details, and add or edit transaction charges and deduction fees.
After you add a third-party, you must setup a third-party site in the Sites Management. Go to the Site Management page, create a new site, choose a 3rd Party Site, and choose the third-party to use.
Cross/Up Sales Section
For more information, please see NATS5 Cross Sales and NATS5 Up Sales
The Cross Sale and Up Sell Management pages display and let you edit your up sells and cross sales. A cross sell gets sent to a biller when a surfer submits your pre-join page and the biller displays the option for another site on their join page. An up sell is an option the member can selected after they join your site.
You must add a biller that supports cross-sells in your NATS5 Biller Management first. To add an incoming or outgoing cross sell, click the Add buttons that appear at the top-right of each page. Fill out the corresponding information and click "Save Changes".
Mass Mailing Section
For more information, please see NATS5 Mailing Management
Adding Linkcodes to Emails
NATS lets you automatically generate affiliate linkcodes when you send emails to affiliates using the nats_list_linkcodes template function. You can list linkcodes in an email or automatically append the natscode to an emailed tour link.
For more information, see the nats_list_linkcodes article.
The Mailing Management is a section of NATS that allows you to send automated emails to your affiliates and members.
The Mailing Management list displays information about each mailer, including the subject, target, details, and if they have been completed or are still unscheduled. The actions for each mailer include:
- The Mailer Overview displays mailer information, rules, and if it is unscheduled, gives you the option to send a test email to yourself or send the mail to the listed members or affiliates.
- The Delete Mail icon deletes this email.
You can prevent NATS from sending email to affiliates and members who don't want to receive your email. To do so, click on the Remove Lists section under Mass Mailing and enter affiliate or members email addresses into the remove list boxes. No matter what display rules you set, none of these affiliates or members will receive a mailing from NATS.
Communications Section
For more information, please see look at the NATS5 sections on the right side of this page and expand the Communications section.
The NATS5 Communications has a Notifications section , Messages section, and News Items section lets you send news items to all of your affiliates or notifications to specific affiliates.
All affiliates receive news; NATS displays the most recent news item at the top of their Affiliate Overview page. To create a new news item, go to the News Item section and click "Add News Item". Enter your news item's subject, section, body, and choose a display date.
Notifications act like emails. You can send a notification to specific affiliates or all affiliates, and affiliates can read the notification and then delete it. NATS displays the number of new notifications at the top-right of every affiliate page. Clicking on the number of new notifications or going to the Messages tab of My Account shows the affiliate their list of received and sent notification.
To send a new message, go to the Messages section and click "Send Message". Enter the subject and body of your message. In the Send To field, enter an affiliate's username or enter ALL to send the message to all affiliates.
You can also search notifications, as well as seeing what notifications have been sent to you, and what notifications you have sent out to your members or affiliates, through the "Notifications" tab at the top of the page.
Support and Maintenance Section
For more information, please see NATS5 Cleanup Database
The Support and Maintenance section has different sections that lets you remove old information from your NATS database and logs. As a failsafe measure, you cannot remove information vital to payments, payouts, or statistics. All database cleanings make a SQL-formatted backup of the data to be removed and place it in the NATS/backups directory. Cleanup of a large amount of files can take a long time to run, so we recommend you regularly cleanup your logs.
You can also view NATS information, including the license and NATS version information.
Tables that should be cleaned soon will be indicated next to the table name. Clean a table by clicking on the table overview from the "Actions" menu on the right, and click the "Clean Table" button.
Here you will also find the Logging Section, which lets you view information logged by NATS. Before any information appears here, you must enable logging in the Configuration Section.
Each log has the available actions:
- The View Log action lets you view the log with detailed information.
- The Clean Up Log File action will clean up the log, where you can choose to cleanup by the number of rows or a date and keep a number of rows or rows before a specific date.
- The Delete Log action will delete the log.
Configuration Section
For more information, please see NATS5 Configuration
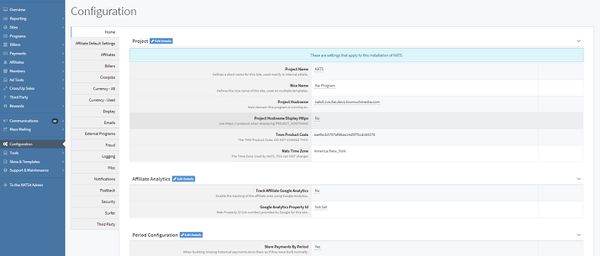
The Configuration section lets you manage your NATS configuration settings. It is not necessary to set up this Admin, as the default settings provided by your NATS install should work with your site. You should be certain of what you are doing before you edit these settings, as it is possible to cause internal problems when changing some settings.
The NATS configuration admin works in conjunction with the NATS configuration file. The configuration file is stored in the NATS directory on your server as includes/config.php.
Several tabs let you find configuration options:
- The Home options are the primary NATS settings. Some options can't be edited; if you need these options changed, please submit a ticket.
- The Security options configure who can access secure areas of your NATS program. Be careful editing these settings: you can easily lock yourself out.
- The Fraud options allow you to configure your fraud detection settings.
- The Billers options provides very specific options for further configuring your billers.
- The Email options tell NATS when to send emails, as well as the subjects of the emails and what address to send them from. NATS only sends email if you enter a subject in any of the fields.
- The Affiliates options let you set affiliate requirements, as well as what is displayed to them on the main Affiliates page.
- The Currency options change the exchange rate or how currency is displayed. Currency exchange rates must be manually set up here.
- The Cronjobs options change how NATS does scheduled tasks.
- The Logging options change what NATS logs.
- The Display options affect what will be displayed in admin areas and reports.
For a description of important options, please see the Configuration Options article.
