NATS4 Database Cleanup
The NATS4 Cleanup & Maintenance Admin allows you to remove old, unnecessary information from your NATS database and logs. As a necessary precaution, NATS will not allow you to remove information vital to payments, payouts, or statistics in this admin.
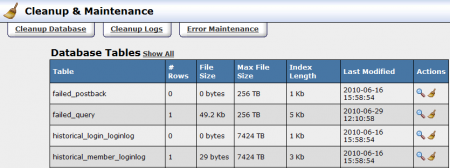
To clean up a database table, click the "Clean Table" icon, which is marked by a broom. On the next page you can select the Max Number of Rows you would like to clean up, as well as what kind of backup you wish to run. NATS offers multiple formats to backup your database: MySQL Dumps, CSV dumps, and no backup. All database cleanings create a SQL-formatted backup of the data to be removed and place it in the nats/backups directory for storage.
Cleanings can often take a long time to run, so NATS runs the database cleanup as a background process, allowing you to keep working while the database is cleaning. Database rows are also deleted incrementally so that your database table won't be locked for a long time.
Tables that should be cleaned soon will be bold and colored red. You can clean a table by clicking on the Clean Table icon to its right or view information about the table by clicking on the View Table icon.
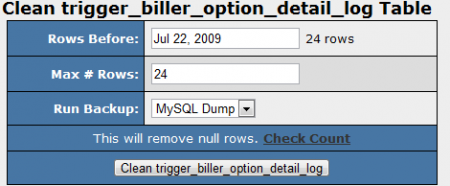
After you click the Clean Table icon, you will be taken to a page where you can configure settings for the cleanup. Available settings include:
- Rows Before - all rows before whatever date you input will be cleaned.
- Max # Rows - this determines the maximum amount of rows NATS will clean at a time
- Run Backup - select whether you want a MySQL Dump, a CSV Dump, or no dump.
Once you have configured your settings, click the Clean button to start your cleanup.

