Managing Templates

- In the first drop down box shown, you can select which skin you want to view.
- The second drop down has the sections of templates you can view for the skin:
- All Sections, ajax, css, function, page, and video. These sections are only for the pre-built templates. If you add more template that are not in the sections mentioned, it will be added to the drop down as you add the templates.
- If you chose All Sections then it will show the sections listed after All Sections. And if you chose a specific section it will only show the templates for that section.
About Template

The above picture is only part of the list of templates provided for the skin type advanced.
It will show the name, header, footer, description,originates from, and actions for each template.
- Name is the name of the template.
- Header is the name of the header of the template. If there is no header for the template then "-none-" will be in its place.
- Footer is the name of the footer of the template. If there is no footer for the template then "-none-" will be in its place.
- Description is a short description of what the template is for.
- Originates From is where the template is coming from.
- The first parent skin will say: ( If you are not familiar with what parent skin is then please refer to TubeStudio Adding Skins).
- It will say "Traditional Tube" if your base skin was chosen to be "Traditional Tube".
- It will say "xHTML" if your base skin was chosen to be "xHTML".
- It will say "customized" if your base skin was chosehn to be "Bare".
- Any other parent after the first parent:
- It can still have "Traditional Tube", "xHTML", and "customized" if the parent of the skin was not edited.
- If the template of the parent skin was edited, then this column should be the name of the parent skin.
- If the template was edited in the current skin, then it should have customized.
- Actions
- If the templates were not edited then the actions should look like
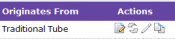 .
.
- If the templates were edited then the actions should look like
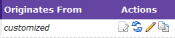 .
.
Create Template

To create a template:
- Chose the section your template will be in:
- page_
- include_
- function_
- css_
- external_
- ajax_
- Then type in a name for that template. The ones that have been pre-built use what functionality it is for.
- Chose whether you want a header. If you don't want a header, then chose "No Header" in the drop down.
- Chose whether you want a footer. If you don't want a footer, then chose "No Footer" in the drop down.
- Write a description or it could be left blank.
- Click Create when you are done.
It will bring you to the page where you can edit the template you just created.
There are two buttons at the bottom of the page  and
and  .
.
- The Save and Continue allows you to save what you have done and lets you continue to work on it without leaving the page.
- The Save Template saves your work and goes to the list of templates for the skin.
Actions
Before editing the actions .
- The middle two actions are dimmed so they can't be used.
After editing the actions .
- The first action is dimmed and the middle two appear.
- To edit the template for the first time, click on
 . The middle two actions will show up.
- To revert the template back to the Originated From, click on
 . Warning: This doesn't undo the changes you've made last time. It will change the template to what it was before all the changes were made.
- To edit after the first time, click on
 .
.
- To copy the the template, click on
 .
.
