Mallcom
From TMM Wiki
Jump to navigationJump to search
These step-by-step instructions walk you through the steps to set up Mallcom and describe setting up a site and a program that track all traffic you direct to Mallcom. First you setup Mallcom as a Third Party, next you setup a site in NATS devoted to tracking Mallcom Traffic, finally you setup a Third-Party Program to properly payout your affiliates for sending traffic to Mallcom.
Please setup your account with Mallcom before starting.
Third-Party Admin
Log into NATS and navigate to the screen, 3rd-Party Admin.
- Towards the bottom, select Mallcom from the dropdown, then click "Add".

- You will then be taken to a screen similar to this:


- In the Fees section, this is where you will tell NATS how much Mallcom will be taking from each transaction. Below that, you may choose how NATS takes out the Third-Party fees.
(Before Payout means you are sharing the costs with your affiliates and After Payout means you pay all third-party fees.) - In the Account info section, fill in the following information (contact Mallcom if you don't know any of this information):
- Affiliate ID: the Affiliate ID that you have on file with Mallcom
- DB Host: the domain where your database with Mallcom resides
- DB DB: the name of the database you have with Mallcom
- DB User: the username NATS will use to log into the Mallcom database when NATS does its daily poll
- DB Password: the password NATS will use to log into the Mallcom database when NATS does its daily poll
- Default NATS Code: the linkcode to be sent to Mallcom if one is not provided by the referring URL already (this acts as a catch-all so that you can track ALL traffic going to Mallcom via NATS). You do not need to set this up now; this may be configured after you set up a third-party site in NATS. You may enter any valid NATS linkcode, but we recommend you use the default linkcode for your Mallcom site in NATS (to be configured next).
- Click “Save” on the right-hand side.
- In the Fees section, this is where you will tell NATS how much Mallcom will be taking from each transaction. Below that, you may choose how NATS takes out the Third-Party fees.
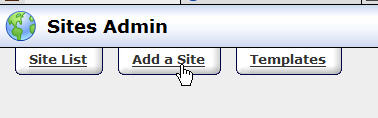
Sites Admin
Within NATS, navigate to the screen, Sites Admin.
- Click on Add a Site near the top of the Sites Admin.
- You will be taken to something similar the following screen
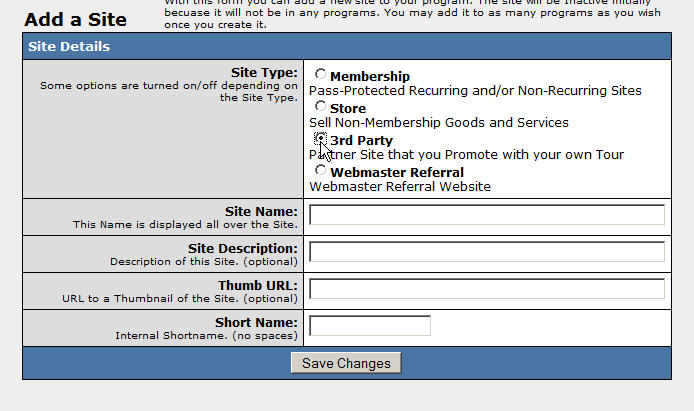
- On this screen, choose 3rd Party as the Site type.
- Enter a Site Name. You may also give a Site description and Thumbnail (Icon) URL.
- Enter a shortname for this new site. (Shortnames can only be used once within NATS and can only contain letters and numbers.)
- Click on “Save Changes”. This displays additional options below.
- The first new item is a drop-down box listing all third parties set up in NATS. Choose Mallcom from this dropdown.
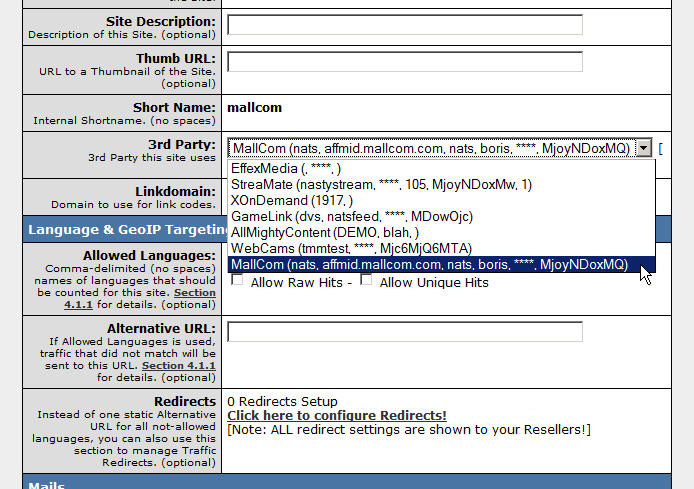
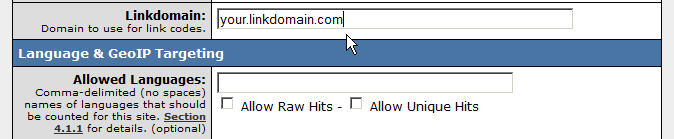
- Enter the linkdomain that will redirect to Mallcom. This linkdomain should be a virtual host of your NATS install
- Scroll down to the section, Third Party Details. In the URL field, enter the Mallcom URL you want the user to visit after they go through your tracking script.


Programs Admin
Unlike other 3rd parties, Mallcom can be added to any "Standard" type program that you already have set up.