Difference between revisions of "NATS5 Tour Overview"
| Line 54: | Line 54: | ||
== Billers Tab == | == Billers Tab == | ||
| − | The Billers Tab displays a list of all the billers in your NATS install. By clicking the "+" button next to the biller, a list of biller information will appear that will need to be filled in in order for the tour and join options to | + | The Billers Tab displays a list of all the billers in your NATS install. By clicking the "+" button next to the biller, a list of biller information will appear that will need to be filled in in order for the tour and join options to function properly. <br> |
<br> | <br> | ||
[[File:Tour-Overview_Billers.jpg|border|600px]]<br><br> | [[File:Tour-Overview_Billers.jpg|border|600px]]<br><br> | ||
| − | |||
== Email Tab == | == Email Tab == | ||
Revision as of 11:34, 29 July 2019
The Tour Overview in NATS is where you can find all of a site's tour information, edit tour settings, configure billers with the tour, and more.
To access a Tour's Overview, go to the Site Management, locate a site you would like to see a tour for, visit that site's Site Overview, and click on the Tours tab. Once there, you can either click on the tour name or click the "Actions" button to the right of the tour and click "Tour Overview".
Details Tab
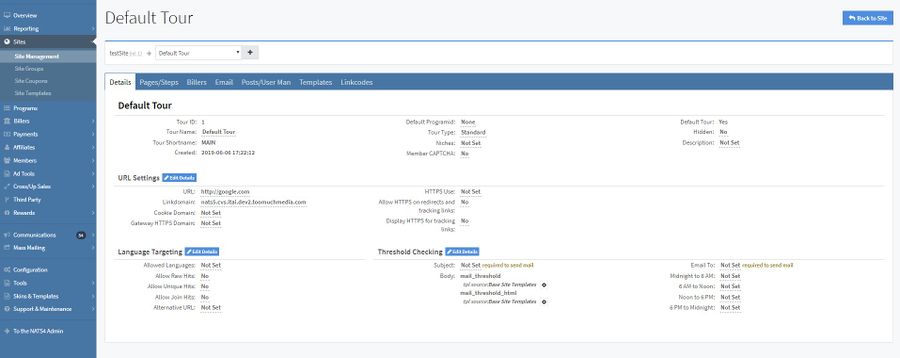
The Details tab displays detailed information about the tour. On this tab, you can edit tour information and settings.
- Tour ID: The ID of the tour.
- Tour Name: The name of the tour.
- Tour Shortname: The short name for your tour. (If the tour is a default tour, the short name will automatically be set to "MAIN".)
- Created: The date and time of creation of the tour.
- Default Programid: The default program for the tour.
- Tour Type: Tours can either be a Standard type or a Mobile type.
- Mobile Tours allow you to automatically redirect surfers using mobile phones to tours specifically designed for them. This allows you to create a tour that is less resource-heavy, allowing members of your site on mobile phones to browse easier.
- Niches:
- Member CAPTCHA:
- Default Tour: Specifies if the tour is the default tour for the site.
- Hidden: If set to "Yes", the tour will be hidden on the site.
- Description: The description for the tour.
URL Settings
- URL:
- Linkdomain:
- Cookie Domain:
- Gateway HTTPS Domain:
- HTTPS Use:
- Allow HTTPS on redirects and tracking links:
- Display HTTPS for tracking links:
Language Targeting
- Allowed Languages:
- Allow Raw Hits:
- Allow Unique Hits:
- Allow Join Hits:
- Alternative URL:
Threshold Checking
- Subject:
- Body:
- Email To:
- Midnight to 6 AM:
- Noon to 6 AM:
- 6 PM to Midnight:
For the URL Settings, Language Targeting, and Threshold Checking, you can click the "Edit Details" button next to each title, and the fields will all be able to be edited on the tab.
Pages/Steps Tab
Billers Tab
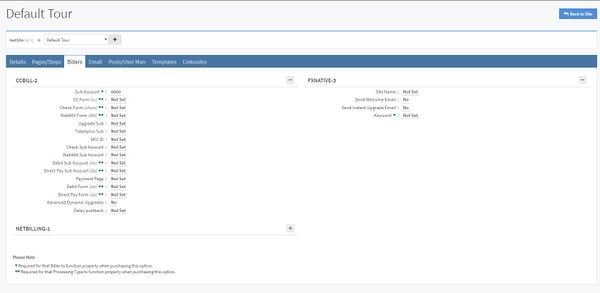
The Billers Tab displays a list of all the billers in your NATS install. By clicking the "+" button next to the biller, a list of biller information will appear that will need to be filled in in order for the tour and join options to function properly.

Email Tab
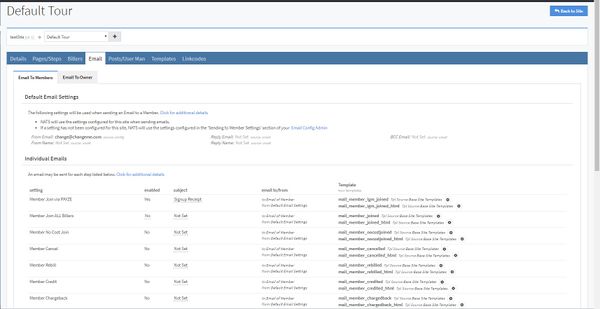
The Email Tab contains various configurable settings that NATS will use for the site the tour belongs to when sending emails to either the site members or the site owner. The email settings for members are under the "Email To Members" tab, and the email settings for the site owner are under the "Email To Owner" tab.

The "Individual Emails" table specifies the steps in which an email can be sent out under the "setting" column. The table also specifies whether that setting is enabled, the subject of the email, who the email is sent to and from, and the mailing tour templates.
- Enabled: Enabling a mail step will allow the mail to be sent when that step occurs.
- Subject: The subject in each step is required to send an Enabled mail.
- Template: The templates will be used as the body of the mail being sent. Clicking the gear next to the template will give you the option to customize or duplicate the template.
