Difference between revisions of "NATS5 Affiliate Overview"
| Line 135: | Line 135: | ||
=== Add Sale === | === Add Sale === | ||
| − | The "Add Sale" button lets you manually add a sale for this affiliate. For more information, please see our NATS5 Manual Sale wiki. | + | The "Add Sale" button lets you manually add a sale for this affiliate. For more information, please see our [[NATS5 Manual Sale]] wiki. |
| − | |||
=== Add Invoice === | === Add Invoice === | ||
Revision as of 17:42, 15 July 2019
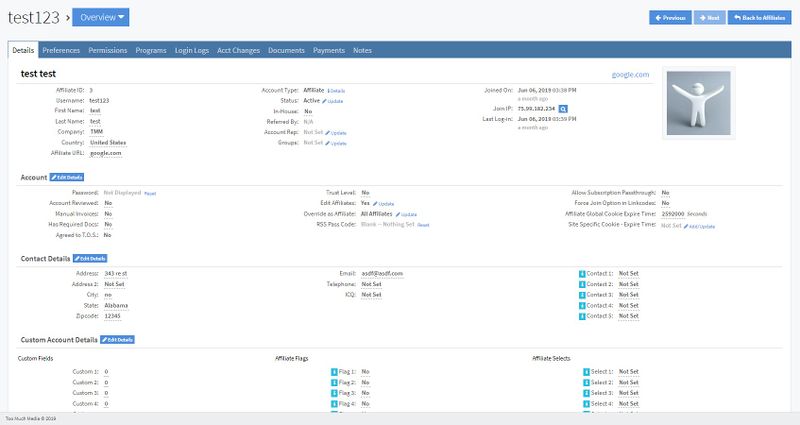
The Affiliate Overview displays the affiliate's account information.
Details Tab
The Details Tab displays general information about the affiliate. This includes:
- Affiliate ID: The affiliate's ID.
- Username: The affiliate's username.
- First Name: The affiliate's first name.
- Last Name: The affiliate's last name.
- Company: The company the affiliate belongs to.
- Country: The country the affiliate belongs to.
- Affiliate URL: The website of the affiliate.
- Account Type: The account level of the affiliate.
- Status: The status of the affiliate, which can be updated by clicking the "Update" link next to the status. This can be set to Active, Disabled, or Banned, and you can input the public and internal reason why the affiliate was set to the chosen status.
- In-House: This tells whether this particular affiliate works for you. Designating an employee as an in-house account is useful, as you can prevent affiliate payouts from being built for that particular account, thus preventing unwanted payouts.
- Reffered By: This will display the affiliate referrer, if it is set.
- Account Rep: Displays the account rep associated with this affiliate. This can be updated by clicking the "Update" link, where an account rep and program can be chosen, or the account rep can be deleted.
- Groups: Displays the group name that the affiliate is a part of. This can be updated by clicking the "Update" link next to the group, where a new group can be created or the affiliate can be added to an existing group. For more information, please see our NATS5 Affiliate Groups wiki.
- Joined On: The day the affiliate joined your NATS.
- Join IP: The IP address of the affiliate when they joined your NATS. Clicking the magnifying glass button next to the IP will give more information about this location.
- Last Log-in: The last login date of the affiliate.
Account Details
- Password: The password of the affiliate account. This can be reset by clicking the reset link next to the password.
- Account Reviewed:
- Manual Invoices: Specifies whether the affiliate has the ability to make manual invoices.
- Has Required Docs: Details whether the affiliate has completed the required documents.
- Agreed to T.O.S.: Specifies if the affiliate has agreed to the NATS Terms of Service.
- Trust Level:
- Edit Affiliates:
- Override as Affiliate:
- RSS Pass Code: Displays the RSS Pass Code. This can be reset by clicking the "Reset" link next to the code, which will generate a new RSS Pass Code.
- Allow Subscription Passthrough:
- Force Join Option in Linkcodes:
- Affiliate Global Cookie Expire Time:
- Site Specific Cookie - Expire Time:
Contact Details
- Address: The address of the affiliate.
- Address 2: Alternate address of the affiliate.
- City: The city in which the affiliate resides.
- State: The state in which the affiliate resides.
- Zipcode: The zipcode in which the affiliate resides.
- Email: The email address of the affiliate.
- Telephone: The telephone number of the affiliate.
- ICQ:
- Contact 1-5: The reseller contacts of the affiliate.
Custom Account Details
- Custom Fields: Custom fields that can be set for the affiliate.
- Affiliate Flags: Flags that can be configured for the affiliate.
- Affiliate Selects: Selects that can be set for the affiliate.
Preferences Tab
The Preferences Tab details various settings for the affiliate.
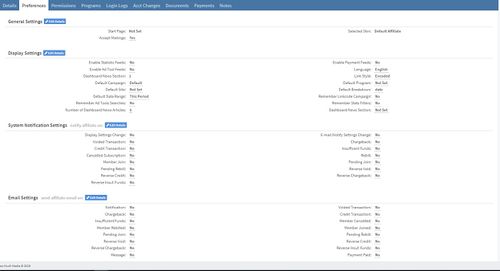
These settings are all able to be updated and set by the affiliate. As such, these are all settings that are specifically catered to the affiliate and can also be found in the "My Account" tab in the Affiliate Area.
Permissions Tab
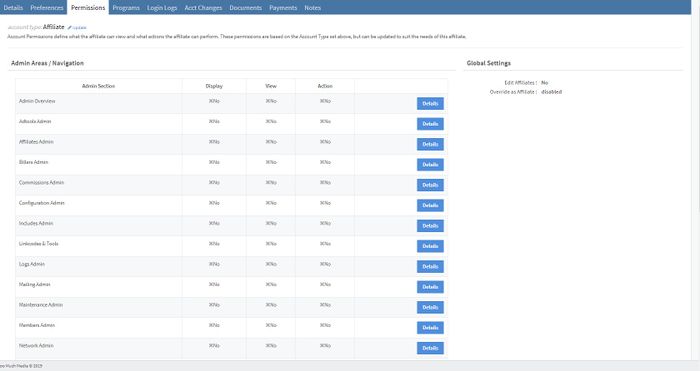
Account Permissions define what the affiliate can view and what actions the affiliate can perform. These permissions are based on the Account Type set above, but can be updated to suit the needs of this affiliate.
To update the account type, you have to also have the permissions to be able to update another affiliate's account type. If you have those permissions, then click on the "Update" link next to the account type and select which account type you want that affiliate to have. This will then update the permissions to fit that account type accordingly.
The Permissions table contains the admin section and the corresponding permissions that the affiliate has for that section. This includes:
- Display: Determines whether the section is displayed for the affiliate.
- View: Determines whether the affiliate can view the section.
- Action: Determines whether the affiliate can perform any actions in the section.
By clicking the "Details" button next to the "Action" column, specific affiliate permissions can be updated for each page and each section. When the permissions are set, click "Save Changes".
Global Settings indicates whether the affiliate can edit or override other affiliates.
Programs Tab
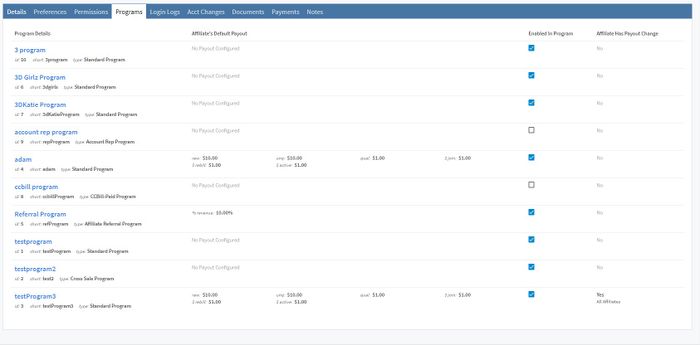
The Programs Tab displays a list of all the programs in your NATS, as well as whether the affiliate is enabled for that program or not. This tab contains program details, including program ID, the program's short name, and the program type.
The "Affiliates' Default Payout" column details the program's default payout changes. The "Affiliate Has Payout Change" tells whether the affiliate is part of that program's payout, as set on the program's payout page.
To enable the affiliate to a specific program, check the checkbox in the "Enabled in Program" column.
Login Logs Tab
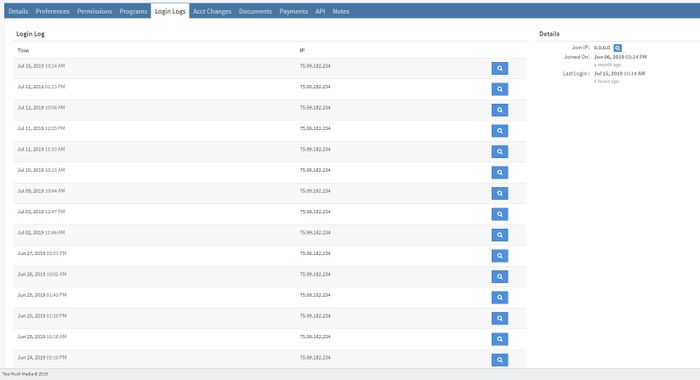
The Login Logs tab details all of the times the affiliate has logged into your NATS. The details recorded and logged include Time and IP.
Clicking the magnifying glass button next to each log will lookup the IP address.
Other details documented include the Join IP of the affiliate, the Joined On date, and the Last Login time and date.
Acct Changes Tab
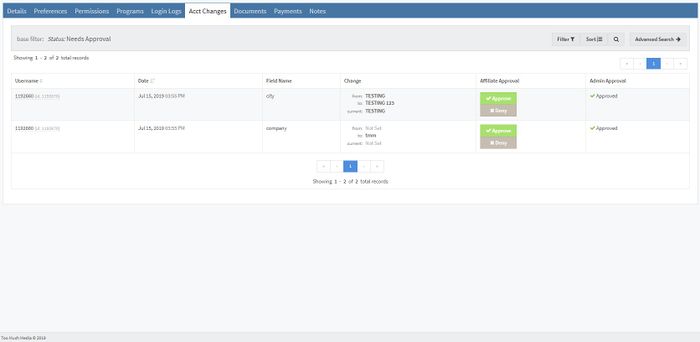
The Account Changes tab displays a list of affiliate account changes and lets you prevent affiliates from changing their account details without administrator approval.
The Account Changes table includes the username of the account that had a change, the date of the change, the field name, the actual change (before/after), Affiliate approval, and Admin approval.
For more information, please see our NATS5 Account Changes wiki.
Documents Tab
The Documents Tab is where the affiliate can upload documents and displays other document details.
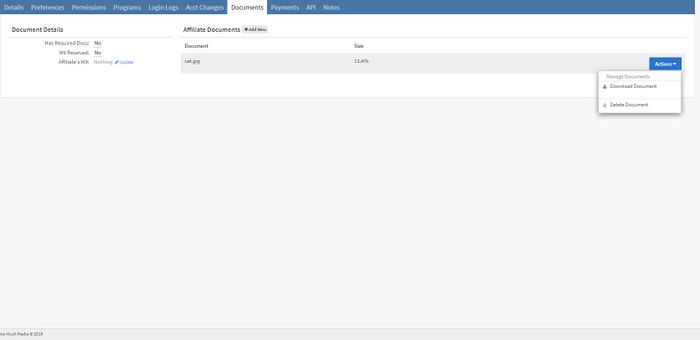
To upload a document, click the "Add New" button next to the "Affiliate Documents" title. The document details include the name and file type of the document, the size, whether the affiliate has required documents, whether the affiliate has uploaded a W9 document, and the option to update or upload the affiliate's W9 document by clicking the "Update" link next to the affiliate's W9.
Clicking the "Actions" button next to a document allows you to download or delete that document.
Payments Tab
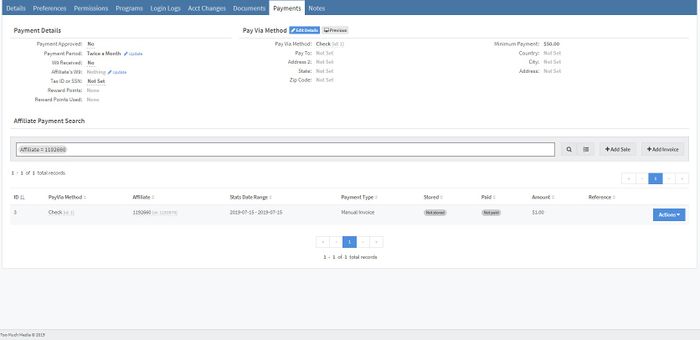
The Payments Tab provides payment details about the affiliate's payment history.
Payment Details
- Payment Approved: Tells you if a payment was approved.
- Payment Period: Details the payment period that the affiliate is using, which can be updated by clicking the "Update" link next to the payment period. For more information, please see our NATS5 Payout Periods wiki.
- W9 Received: Tells whether the W9 for this affiliate was received.
- Affiliate's W9: The actual W9 document. To upload or remove the W9, click the "Update" link next to the W9.
- Tax ID or SSN: The affiliate's Tax ID or Social Security Number.
- Reward Points: How many reward points the affiliate has remaining.
- Reward Points Used: How many reward points the affiliate has used.
(For more information about reward points, please see our NATS5 Reward Points wiki)
Pay Via Method
Some slight pay via method information is detailed here as well. To edit the fields for the pay via method for this affiliate, click the "Edit Details" button next to the Pay Via Method title. This tab also allows you to select previously used pay via methods by clicking the "Previous" button next to the "Edit Details" button.
For more information on Pay Via Methods, see our NATS5 Pay Via Methods wiki.
Affiliate Payment Search
You can search for different affiliate payments by searching for the payment by two different fields, the Affiliate ID and the Payvia Type. All of the results will be filtered out based off of the search.
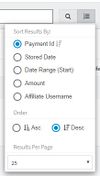
By clicking the button next to the magnifying glass, you can set the sort option, as well as whether you want the results in Ascending or Descending order and how many results will be displayed per page. The sorting options include Payment ID, Stored Date, Date Range (Start), Amount, and Affiliate Username.
Add Sale
The "Add Sale" button lets you manually add a sale for this affiliate. For more information, please see our NATS5 Manual Sale wiki.
Add Invoice
The "Add Invoice" button allows you to manually add an invoice to the affiliate. For more information, please see our NATS5 Manual Invoice wiki.
Notes Tab
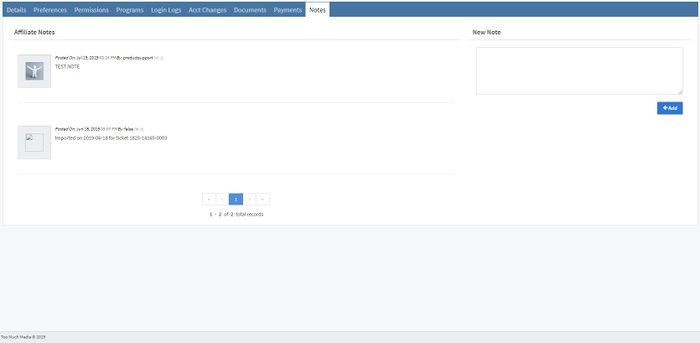
The Notes tab holds records of the affiliate notes. Affiliate notes record the date and time of entering that note, as well as display the admin who entered it.
To add a new note, type the note into the text box on the right of the page, and click "Add" when finished.
