Adding Cascades
Adding A New Cascade
After adding the first Biller to the Billers Admin, NATS will create default cascades for all payment types supported by that Biller. If a Biller supports Credit Cards, a Cascade with a short name of "default" and a description of "Join By Credit Card" will be created automatically. If the Biller also handles Check / ACH payments, a cascade called "defaultcheck" with a description of "Join By Check" will also be created. From this point forward, any new billers that are added to the Billers Admin will not automatically create new Cascades or be automatically included in any existing Cascades -- you may, however, add them as steps in your existing Cascades or create new Cascades, in which you may include your new Billers. Creating new Cascades is a simple process, broken down into three smaller steps - creating the cascade, configuring the cascade and then completing the setup by adding additional steps to the cascade.
Create a New Cascade
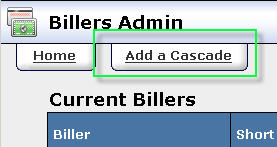
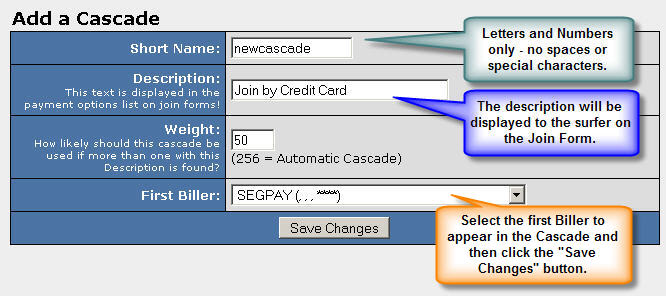
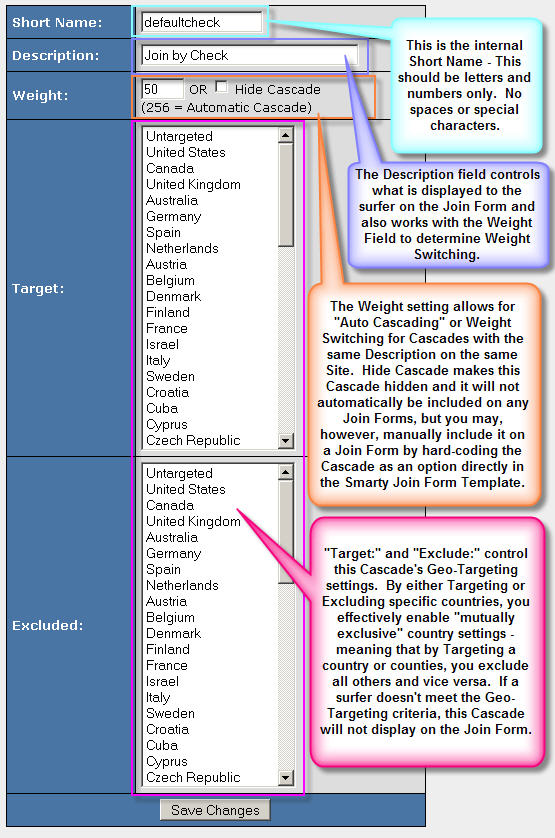
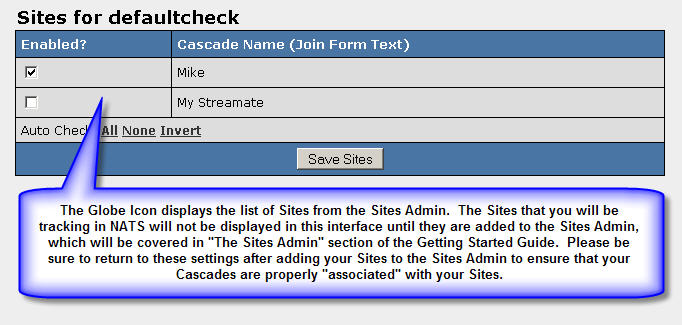
Creating a new Cascade begins by navigating to the Billers Admin and clicking the "Add a Cascade" tab at the top of the page. Once there, you will be asked to give this cascade a short name, description, weight, and select the first biller for this Cascade. This process is detailed in Figures 1.1 through 1.3:
The basic four options and attributes required when created new Cascades are as follows:
- Short Name - The Short Name of the Cascade, or anything in the NATS admin, refers to a unique, internal identifier used by NATS to identify this item. In this case, the Cascade Short Name will be used as the value of the selected Cascade on the Join Form. All Short Names should consist of alphanumeric characters only and contain no spaces or special characters.
- Description - This text will be displayed on the Join Form for each Cascade that's available for each site. This description is also important for Random Cascade Switching. If more than one Cascade exists on a single site with the same Description, they will be evaluated for the random selection. At this point the Weight field determines the frequency by which this cascade will be displayed on the Join Form.
- Weight - Used in conjunction with the Description field to randomly select which cascade with the same Description will actually be displayed on the Join Form. The weight value contributes to the total weight value of all Cascades with the same Description. This is to say that if 5 Cascades exist with the Description of Join by Credit Card on the same site and they each have a value of 50, then there is a 20% chance any given Cascade with that Description will be selected and displayed on the Join Form. The value 256, is special, however. If the Weight field is set to 256, this is considered to be an Automatic Cascade, which forces NATS to skip the NATS pre-join form and it will send the surfer directly to the Biller's Join Form. This also means that there will be a random username and password created for this surfer's pre-join record. This might be useful for Billers that don't utilize any pre-join information or for certain foreign Billers.
- First Biller - The First Biller drop down list contains a list of Billers currently configured in this NATS installation. This selection only determines the first Step in the Cascade and may be changed or modified later.
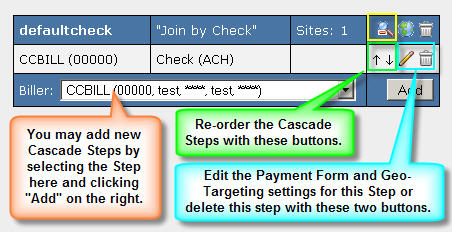
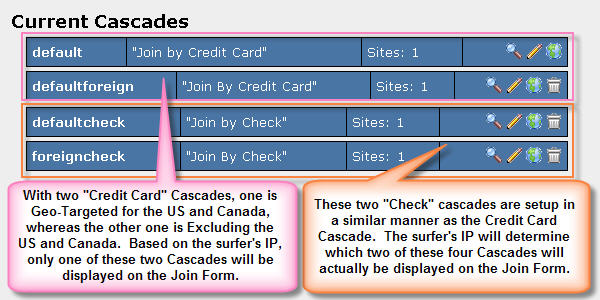
After the Cascade record has been created, it can be seen in the Billers Admin with the list of Cascades. Each cascade beyond the first that will have four individual actions that can be taken (also depicted in Figure 1.4):
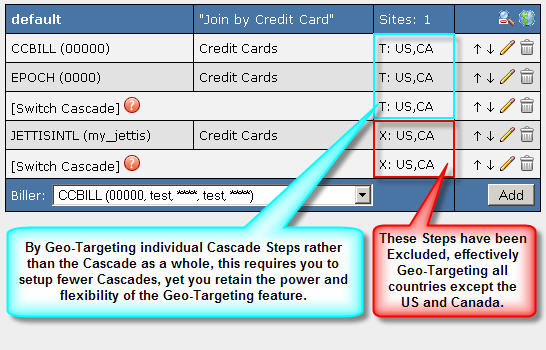
Cascade Details (Magnifying Glass) - Allows you to view the Cascade Steps, modify the Cascade Steps, change the order of the Steps in the Cascade, and remove existing Cascade Steps. This also allows you to edit the Geo-Targeting settings and currency form settings for each individual Cascade Step.
Edit (Pencil) - Allows you to change the Description, Weight, and Geo-Targeting settings for the Cascade as a whole.
Sites (Globe) - Allows you to select the sites to which this Cascade will be available. By default, each Cascade is not available for any sites. By making a Cascade available for a site, this will make the Cascade show up as a payment form on that site's Join Form.
Delete (Trash Bin) - This will allow you to delete a cascade. Please note that you cannot delete the default cascade, since NATS needs at least one Cascade in order to process Joins.
Advanced Cascading
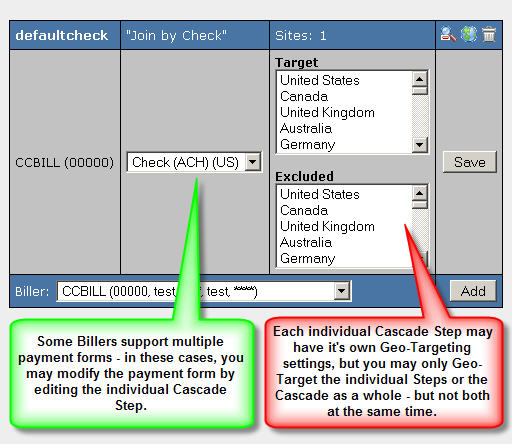
Individual Cascades are often basic and linear in fashion. This is to say that traditionally, it's not uncommon for an Affiliate Program to only have one Cascade for each form of payment accepted by the processors through which you will be processing your transactions. This means that a given Affiliate Program may only have two total Cascades - one for Check and one for Credit Card. If an Affiliate Program handles a significant quantity of non-domestic traffic, it may be beneficial to have additional Billers that specialize in processing transactions from other geographical regions. Geo-Targeting makes utilizing these foreign Billers easy and convenient and will allow you to create single Cascades with individually Geo-Targeted Steps or separate Cascades, one foreign and one domestic, that are Geo-Targeted as a whole. Figures 2.1 and 2.2 depict examples of both Single Cascade and Multi-Cascade Geo- Targeting Schemes:

