NATS5 Site Overview
The Site Overview contains all the information about a site and its tours. The site overview can be accessed from the Site Management page by clicking on the site's name, or clicking the "Actions" button and clicking "Overview".
Details Tab
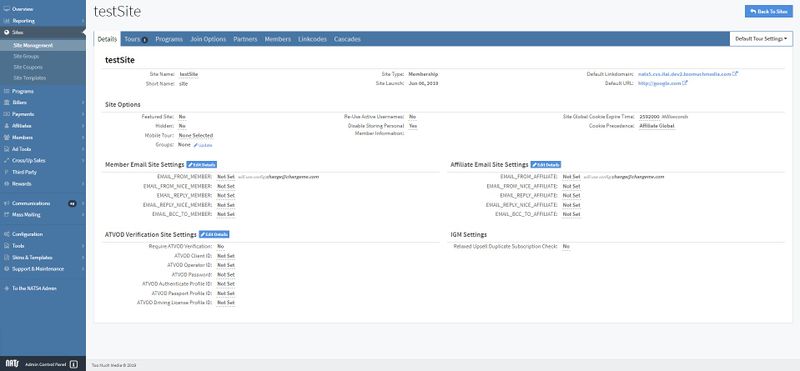
The Details Tab contains specific information about your site and is where you can edit site options, member email site settings, and ATVOD verification site settings. The information in this tab includes:
- Site Name: The name of your site.
- Short Name: The short name of your site.
- Site Type: The type of the site.
- Site Launch: The launch date of the site.
- Default Linkdomain: The domain used to link codes and tracking URL's.
- Default URL: The URL of the site.
Site Options
- Featured Site: Set whether the site is a featured site.
- Hidden: Set whether the site is hidden on the Site table in the Site Management page.
- Mobile Tour: Select a mobile tour (if there is one available).
- Groups: Displays the groups that the site is in. This can be updated by clicking the "Update" link next to the groups, where a widget with a list of the available site groups will be listed and the site can be enabled to these sets. You can also create a new site in this widget. For more information on Site Groups, please see our NATS5 Site Groups wiki.
- Re-Use Active Usernames: If this is not set and a member signs up with the same username as another member, they will not be able to sign up and will have to choose a different username.
- Disable Storing Personal Member Information: If this setting is set to "Yes" and a member signs up to this site, none of the member's contact details or personal information will be shown in the member overview.
- Site Global Expire Time: The amount of milliseconds before a cookie expires.
- Cookie Precedence:
Member Email Site Settings
- EMAIL_FROM_MEMBER:
- EMAIL_FROM_NICE_MEMBER:
- EMAIL_REPLY_MEMBER:
- EMAIL_REPLY_NICE_MEMBER:
- EMAIL_BCC_TO_MEMBER:
Affiliate Email Site Settings
- EMAIL_FROM_AFFILIATE:
- EMAIL_FROM_NICE_AFFILIATE:
- EMAIL_REPLY_AFFILIATE:
- EMAIL_REPLY_NICE_AFFILIATE:
- EMAIL_BCC_TO_AFFILIATE:
ATVOD Verification Site Settings
- Require ATVOD Verification:
- ATVOD Client ID:
- ATVOD Operator ID:
- ATVOD Password:
- ATVOD Authenticate Profile ID:
- ATVOD Passport Profile ID:
- ATVOD Driving Licence Profile ID:
IGM Settings
- Relaxed Upsell Duplicate Subscription Check:
Tours Tab
The Tours tab contains information and details about all of the tours belonging to your site.
Such details include the name of your tour, its ID, its short name, the type of tour, its linkdomain, and the tour URL.
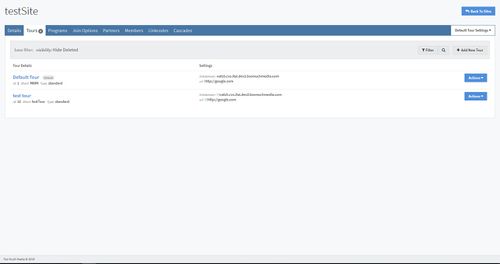
The Tours tab is also an area where you can quickly add a new tour. To do so, click the "Add New Tour" button above the Tours table.
For more information about adding new tours to a site, please see our NATS5 Tour Setup wiki.
Programs Tab
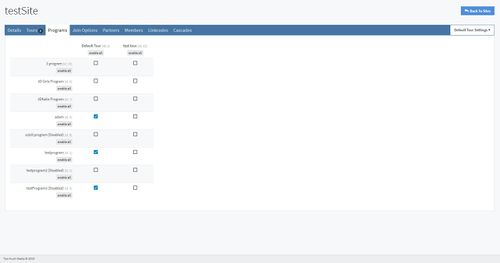
The Programs Tab is where you can find a list of all of your programs. This list will show disabled and enabled programs, as well as if you have any tour enabled for a program. To enable program, click on the checkbox next to the program under each tour, and the tour will be enabled for that program.
You can also enable a tour for each program by clicking the "Enable All" button under the tour name. This will automatically check each checkbox and enable that tour for each program.
Join Options Tab
The Join Option Tab displays general information about all of your join options for that site, including the Join Form Details, Purchase Details, Settings, and Biller Details.
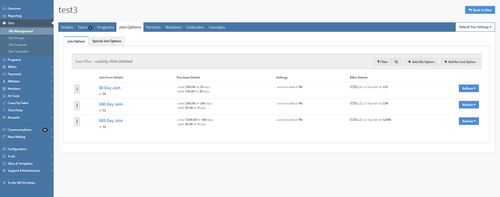
To show deleted join options, as well as active join options, click the "Filter" button and choose the "Show Deleted" option. Otherwise, the filtering will be defaulted to only showing active join options.
To see the Join Option Overview, simply click on the join option. For more information on join options, please see our NATS5 Join Option Overview wiki.
Adding a Join Option
To add a new join option for your site, click the "Add Site Option" button and you will be redirected to the page to fill in information for your new join option.
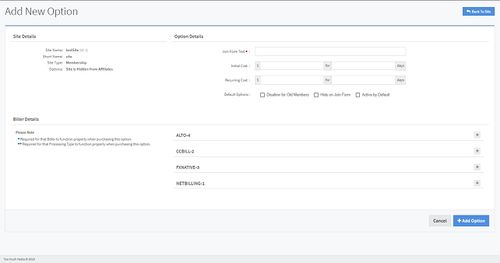
This page displays some site details, biller details, and option details that are to be filled in. These option details include:
- Join Form Text: The name or title of your join option.
- Initial Cost: The initial cost the surfer will have to pay when signing up to your site using this join option. The member will have to pay that initial cost for a certain amount of days.
- Recurring Cost: The recurring cost the member will have to pay for a fixed amount of days.
- Default Options: The default options that you can set for the members and the join option on the site. These are:
- Disallow for Old Members: This will make sure that members that have already signed up are unable to access this join option.
- Hide on Join Form: This will not display this join option on the join form when a member attempts to sign up.
- Active by Default: This will automatically make the member sign up using this join option, and activate this join option by default.
An important part of your join option is the biller details at the bottom of the page. In order for your join option to actually function when a surfer attempts to sign up using this option, you will need to fill in the required biller information so the transaction can be processed and the join option can function properly.
The required fields that will need to be filled in will have an * or ** next to them.
Once finished, click the "Add Option" button, and the join option will appear in the join option table.
Adding a No Cost Option
No Cost Registration is a feature in NATS that allows you to set up a free join option for a site. This join option will create an active member in NATS for your site without going to a biller page. This way, you will be able to offer a free membership option while avoiding potential biller charges, as there are no biller option codes that would allow a No Cost Registration.
To add a No Cost Option, click the "Add No Cost Option" button next to the "Add Site Option" button.

This page only displays some site details and Option details that you will fill in to create your No Cost Registration option. You will need to fill in the Join Form Text, which will be the name or title of your No Cost Registration option, and the amount of days for the Registration Period, which is how many days this option will be active for a member.
Again, the default options include Disallow for Old Members, Hide on Join Form, and Active by Default.
Because this is a No Cost Option, no biller information needs to be added or filled in, as there are no biller transactions involed.
Once finished, click the "Add Option" button, and the No Cost option will appear in the join option table.