Difference between revisions of "NATS5 Join Option Overview"
| Line 76: | Line 76: | ||
Once you are finished, click the "Add Rule" button, and the new rule will be added to the rule table. <br> | Once you are finished, click the "Add Rule" button, and the new rule will be added to the rule table. <br> | ||
| + | |||
| + | [[Category:NATS5]] | ||
Revision as of 11:51, 5 August 2019
The Join Option Overview displays detailed information about a join option, and is where you can edit join option information, biller details, and create, edit, or delete join option rules.
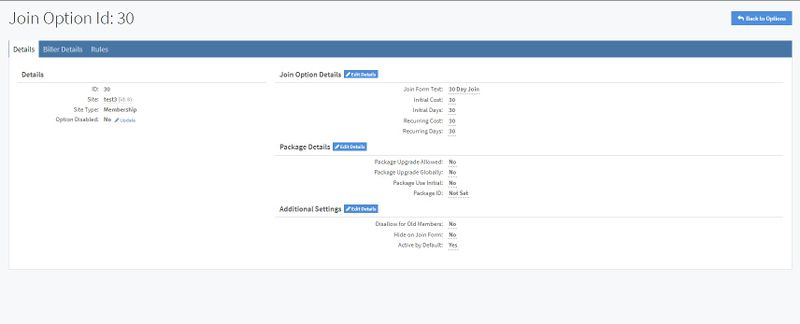
Details Tab
This tab displays specific information about a join option and allows you to update any join option information. Such information includes:
Details
- ID: The Join Option ID.
- Site: The site that the Join Option is associated with. Hovering over the site will displays a popup menu that can lead to the Site's Overview, Tours tab, Join Options tab, and Programs tab.
- Site Type: Specifies the type of site that is listed in the "Site" field.
- Option Disabled: If set to "Yes", this Join Option will not be available to a surfer when signing up to the associated site. This can be changed by clicking the "Update" button to the right of the field, which will either prompt you if you want to delete (disable) or restore (enable) the option.
Join Option Details
- Join Form Text: Specifies the description of the membership option on the join page.
- Initial Cost: Specifies the amount a member will be charged for the initial join.
- Initial Days: Specifies the period of days that the initial cost will last.
- Recurring Cost: Specifies the amount a member will be charged for all subsequent periods after the initial days and cost.
- Recurring Days: Specifies the period of days that the recurring cost will last. When that period is finished, the period will be reset back to the beginning of the recurring days period.
Package Details
- Package Upgrade Allowed:
- Package Upgrade Globally:
- Package Use Initial:
- Package ID:
Additional Settings
- Disallow for Old Members: If set to "Yes", this will make sure that members that have already signed up are unable to access this option.
- Hide on Join Form: If set to "Yes", this will not display this Join Option on the join form when a member attempts to sign up.
- Active by Default: If set to "Yes", this will automatically make the member sign up using this join option, and activate this join option by default.
Biller Details Tab
The Biller Details Tab contains important biller information that will be vital for the Join Option to work properly.
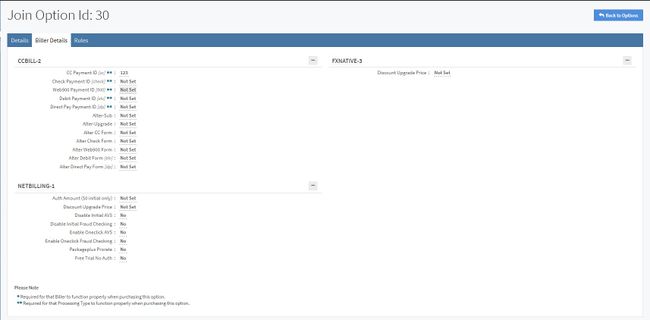
To show biller details, click the "+" button next to the biller. To hide biller details, click the "-" button next to the biller.
Hovering over the biller name will display a popover menu, which will display an "Overview" link that will link to the Biller Overview.
Different billers require different fields to be filled in order for the option to function. If a field has a single "*", the field is required for a biller to properly function with the Join Option. If a filed has two "*", the field is required for that processing type to function properly with the Join Option. Please make sure to at least fill these fields in so the Join Option will work.
Rules Tab
The Rules Tab displays all of the rules created for this Join Option.
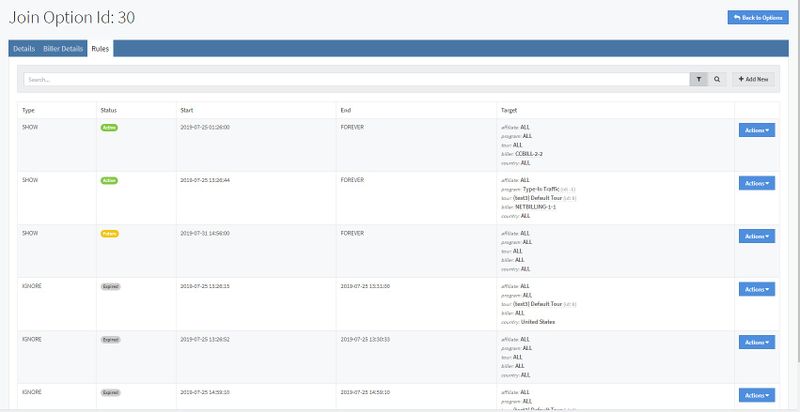
This information is presented in a table with the following information:
- Type: Types include SHOW, HIDE, or IGNORE, and specify the type of rule.
- Note: If a rule is edited, the old version of the rule, as well as any older version, will be under the IGNORE type. Removed rules are automatically set to an IGNORE type.
- Status: The status of the rule. These include:
- Active: The rule is currently shown and active for the join option.
- Future: The rule will be activated in the future, once the start date and time occur.
- Expired: The rule will be expired and inactive once it has surpassed the end date and time. The status will be set to Expired if a rule is edited or removed, similar to the IGNORE type.
- Start: The date and time that the rule can begin being active. The rule will not be active before this date and time.
- End: The rule will expire and no longer be active after this date and time.
- Target: Specifies the different fields that you fill out when creating the rule. Hovering over a field will display a popup menu, where that object's overview can be accessed. (No popup will be displayed hovering over ALL.)
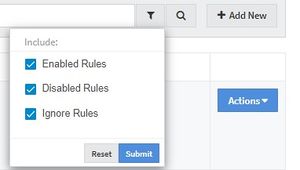
The table can be filtered to display and include Enabled, Disabled, and/or Ignored rules. To do so, click the button next to the search bar and choose which rules you would like to include in the table.
Adding a Join Option Rule
To add a new Join Option rule, click the "Add New" button next to the search bar.
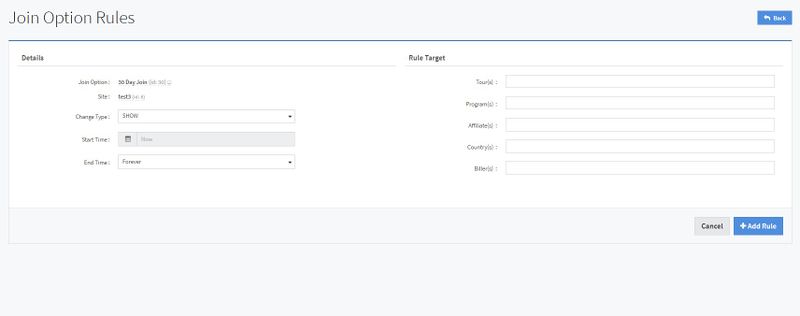
The Join Option and site automatically display the associated fields. The fields can be hovered over by the mouse to display a popup menu, where each overview can be quickly accessed.
The fields to be filled in include:
- Change Type: Specifies the rule type.
- Start Time: The date and time that the rule can begin being active. The rule will not be active before this date and time. The field will default to "Now", but can be change by clicking the calendar and choosing the date and time on the date picker.
- End Time: The rule will expire and no longer be active after this date and time. The field will default to "Forever", but can be set using the date picker by clicking the field and choosing "Specific Date / Time".
- Rule Target: The target tours, programs, affiliates, countries, and billers for your rule. You can choose to add one or multiple different options for each target field by either clicking on the field and choosing from the drop-down menus or typing the field in, where the drop-down menu will display the results that match your text, and you can choose the corresponding result.
- Note: You can also keep any field as empty. Doing so will default that field to include ALL of the available options for that field.
Once you are finished, click the "Add Rule" button, and the new rule will be added to the rule table.