NATS4 Modify Pay Via Type Fields
NATS4 allows you to modify all of the fields that Affiliates are asked to fill out when they setup how they are being paid. This document will explain how to modify the settings for the fields.
The first step is to login to your NATS install. Once logged in, navigate to the bottom of the Affiliate Homepage and locate the 'Administration and Management' toolbox. Once this is located select the 'PAYMENTS' icon and you will be brought to the 'Payments' admin.
Once you are in the 'Payments' admin you will need to locate the sections' tabs. The tabs will appear underneath both the links to other Admin sections and the Admin Section Title Bar. The third tab available on this page is the 'Pay Via Types' tab. Select this tab.
On this page you can view all of the different Pay Via types that you are offering to your Affiliates. To view the fields that your affiliate will be requested to fill out select the 'Configuration' Action icon for the Pay Via Type. In the example we will use the ePassporte Pay Via Type.
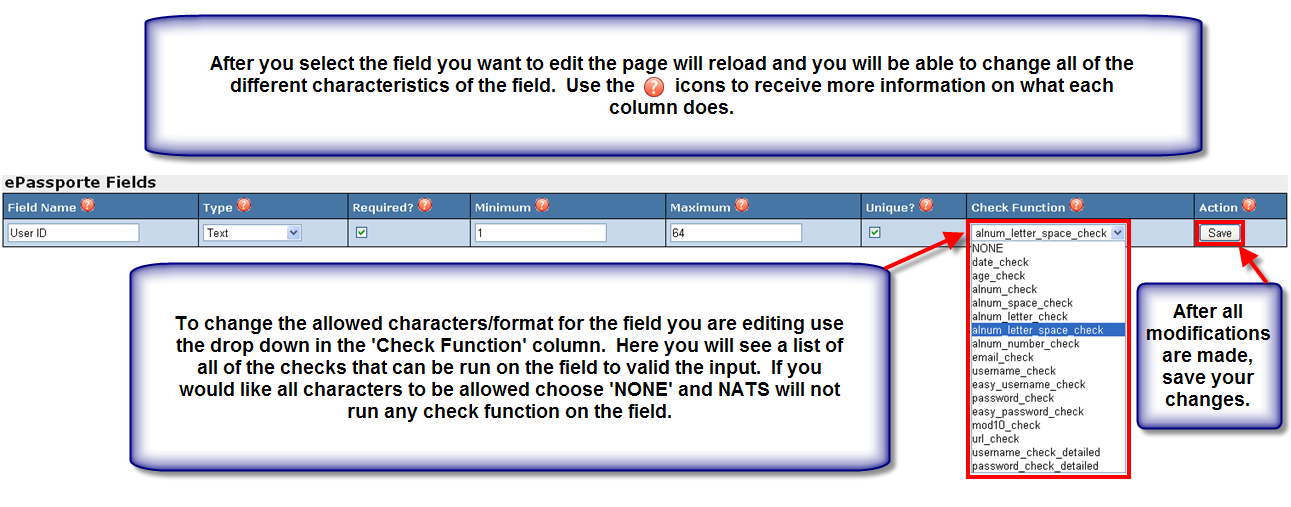
Here you will see the full list of fields that your Affiliates will need to fill out for the specific Pay Via Type. To edit a field select the 'Edit' Action icon.
The page is now reloaded and you are able to edit all of the characteristics of the field such as the 'Field Name', 'Required', and 'Check Function'. Please hover over the help icon in each column to learn more about what each field does. After you are done editing the field characteristics be sure to 'Save' your changes.


